Healthy Living

Planning My New Year’s Resolutions

resolutions lead image

Did ya miss me?  I sure did miss you all and this place.  October and November are the busiest months of the year for me in my day job and life got out of control crazy.  Plus, if I’m honest, I’ve started a dozen posts and just haven’t been able to finish them to my liking.  A little writers block I think.  Well, I sure am feeling back in the game now, so hopefully I can start really cranking out some good posts for you. 🙂

For the past couple of weeks I’ve been thinking about and planning my New Year’s Resolutions.  Every year for the past 3 years I’ve used my resolution to make major changes for our health.  My 2012 resolution was to start buying as much organic food as I was able and to reduce the amount of pre-packaged, processed food we ate.  I also personally gave up sodas completely and cut most of the sugar out of my diet. (This did amazing things for me and was a change I recommend for everyone).  In 2013 my resolution was to complete the Couch to 5K program so that I was exercising regularly and losing that “baby” weight and to also focus a lot of energy on my garden and grow as much of our food as I could.  This past year I decided to start replacing chemical filled products in our home and also vowed to no longer buy eggs from the grocery store that came from horribly treated, factory farmed chickens, but to find a local farmer to buy happy eggs from happy chickens until I can finally get my very own.

One or two big changes is perfect and realistic for me if I want to set myself up for success.  I have done an excellent job (if I do say so myself 🙂 ) at following through and turning these resolutions into permanent lifestyle changes.  For instance, I only bought eggs from the store once this year, and that was for Easter egg dying.  Our farm fresh eggs are beautiful browns, blues and pinks, which are pretty enough for me but weren’t going to allow the kids the fun of coloring them.  I now know of a place I can buy local white eggs, so next year I’ll grab a dozen before Easter from there.  I feel so good about eating these eggs that are not only healthier for us, but have come from chickens leading good, happy chicken lives.  I chose this change for last year after watching Food, Inc..  This has also led me to one of the changes I’ve chosen to make for 2015.  Let’s get to those now, shall we?

Resolution #1Reduce our meat consumption by at least two days per week, and start buying some of our meat from locally, humanely raised sources.  The Super Awesome Husband is a meat and potatoes kinda guy, so meatless meals are a tough sell with him.  I am starting to comb through recipes already in preparation for this change.  If you have good ones, PLEASE feel free to share them with me.  This will be a tough one for me, but if I can find even a few good, hearty meatless meals, I think I can pull this off.

As for the local meat, we have a wonderful market near us that sells amazing local produce, meats, dairy and even honey.  Local, pasture raised meat is very expensive compared to what you can grab at the grocery store, but by eating meatless meals twice a week, I think I can make the switch for at least one meal without our grocery budget taking too much of a hit.  I KNOW that it will be worth the expense.  I have no doubt of that.  Not buying factory farmed meat three times a week, will be 156 fewer packages of meat bought this year.  I can’t change the inhumane conditions at factory farms, nor all of the chemicals pumped into that meat, the antibiotics, nor the unsanitary conditions the meat is sometimes processed in, but I can remove some of my financial support and keep it away from my family’s dinner plates.

Resolution #2:  Grow enough food in our backyard to at least double what I was able to can this past year.  I have to count up the exact number, but I think I got a case of jelly jars of salsa (BIG mistake doing small jars.  We’ve inhaled the stuff.  It will go in bigger jars next year) and a handful of quart jars of tomatoes.  I did a boatload of applesauce, but we bought local apples for that.  It will be a while before our apple trees are really spitting out the apples.  I had dreams of putting up loads of pickles last year, but our cucumber production was really sad and that just didn’t happen.  My goal for this year will be as many jars of tomatoes as possible, salsa, salsa and more salsa and pickles.  If I can do more, that would be fantastic, but I am trying to grow and improve my garden a little every year, so I don’t want to put too much pressure on my little plot.  😉

Resolution #3:  This one is a very personal one that I have been working on little by little the past few years.  I want 2015 to be the year that I finally get back to the size I want to be.  I have bounced up and down since I started having kids, but since giving up sodas and cutting out a lot of sugar, I’ve been able to keep off the weight I lose.  I’m going to get serious and really focus on getting it off, now that I know the healthy choices I’m making will allow me to maintain.  I started juicing last year, and let me tell you, I have never felt as good as I did while I juicing several times a day.  If you haven’t watched Fat, Sick & Nearly Dead it is great for information and inspiration. I caught it on Netflix, but you can watch it here as well:

I bought his reboot book with recipes and a great program to follow and will be starting that this week.

Exercise and lots of fruits and vegetables.  It’s not a new concept, but it’s definitely one that works.  I’ll give you updates along the way.

So, I hope that reading this has made you think about some changes you can make this year, not to make a resolution you will break within the month, but a real change that will be permanent and have a real positive impact on the health of yourself and your family.  Please share your resolutions in the comments below or on the Facebook post for this blog entry.  Writing it down, as simple as it may seem, is a wonderful way to give your words power and to hold yourself accountable.  Let’s all make 2015 a healthier year!!

sign off green

DISCLOSURE:  This post may contain affiliate links, and I may receive compensation for sharing products and information on this site.  All thoughts and opinions are my own.  Thank you for supporting Walking Softly Upon the Earth!  See this page for full site Disclosure.

Kicking the Chemicals~Recipes With Castile Soap

Recipes With Castille Soap

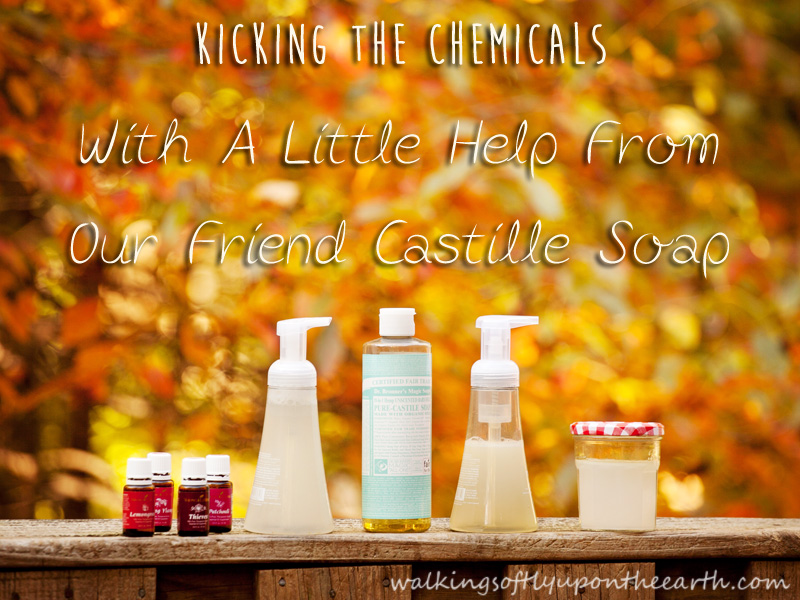
Today we continue our Kicking the Chemicals series, as I try to rid my home (and yours) of as many chemicals as possible.  I’ve recently discovered the wonder that is castile soap.  So did the Super Awesome Husband when he saw the bottle sitting on the counter.  I saw the eyebrows raise as he lifted the bottle to see what it was and got an eyeful of the label.  Whoops!  I knew some explaining was called for, because, really, have you SEEN the Dr. Bronner’s Castile Soap label?  Eek!  But all I could say (with an apologetic look on my face) was a weak “It’s a really safe soap to make other soaps with.”  How lame?  So I threw out “It’s all the rage with the hippie crowd.”  (For those who have just joined us my Super Awesome Husband is really freaking awesome, but the woman he married was not this crazy, crunchy, health conscious, gardening geek that I have become the past five years.  He is patient and supportive, but I am a constant recipient of the eyebrow raise and eye roll before he humors me).  His response?  “Should we really be taking soap advice from hippies?”  😀  Well played Super Awesome Husband.  Well played.  But the castile soap stays.  Score!

I am going to share three crazy cool recipes I am now using in my home.  Antibacterial soap was a big offender I wanted to ditch, but with the months approaching that my children are always the sickest, I still wanted a really good soap to clean those grubby little hands.  Here’s what I found:

IMG_0089

Foaming Hand Soap

1/4 cup of castile soap (I love Dr. Bronner’s Unscented Baby Mild)

5 drops essential oil for scent and extra germ killing power (I LOVE using Young Living’s Thieves for this)

filtered water

Directions:  All you have to do is put your castile soap in a clean, empty foaming hand soap dispenser (I reused some that I had), add your essential oils and fill the rest of the bottle with filtered water.  Mix gently and you’re ready to go.

IMG_0083

I only use soap on my face once in a while because my skin is so dry and I’ve had a hard time finding something that is gentle enough for even using a couple of times a week.  This recipe is wonderful!

IMG_0091

Foaming Facial Cleanser

1/3 cup castile soap

1/2 tsp. sweet almond oil or olive oil

10 drops of Ylang Ylang Essential Oil

6 drops of Patchouli Essential Oil

4 drops of Lemongrass Essential Oil

2/3 cup filtered water

Put all of the ingredients in a foaming soap dispenser and mix gently.  This leaves my face feeling wonderful, and doesn’t cause any additional drying.

This last recipe was a great find for me.  I don’t wear a lot of makeup, but I do like my mascara.  My eyes are super sensitive though, and most makeup remover was either too greasy or burned my eyes.  I found this recipe, and with a slight alteration, it was perfect!

Eye Makeup Remover

1 cup of filtered water

1/4 tsp. of unscented castile soap

1 1/2 tsp. of olive oil

Put all ingredients in a little jar and swirl to mix.  I swirl it a little before I dip my cotton ball in each time just to disperse the oil.  When I get down to the end of the jar I usually need to add just a little bit more oil so that it still works well.

IMG_0080

And there ya have it!  Three more chemical filled products kicked to the curb.  🙂  Proof you CAN take soap advice from a hippie!  😉

sign off green

If you would like more information about Essential Oils I love and use, you can click here, or shoot me an email from the contact page above or directly to [email protected] and I would be happy to answer any questions you might have or send you a free sample.

DISCLOSURE:  This post may contain affiliate links, and I may receive compensation for sharing products and information on this site.  All thoughts and opinions are my own.  Thank you for supporting Walking Softly Upon the Earth!  See this page for full site Disclosure.

Perma what?

post header permaculture

I can not tell you how long I have wanted a little fruit orchard.  The idea of growing baskets of apples and pears, peaches and cherries makes my heart go pitter-pat.  Wanting to provide these three little people with the healthiest food possible does not just mean veggies to me.  When the Super Awesome Husband said we could clear out a little area in the woods for a mini orchard I was over the moon.  I knew I wanted to set it up Back to Eden film style using wood chips and grow everything organically, but I was kind of stumped as to how to deal with pests and disease and how to best attract and keep pollinators.

About a week after we put down all of those wood chips I was reminded of a documentary I had wanted to watch by a fellow gardener.  (Thanks Brad, if you’re reading)!!!  Once again the timing was perfect.  The film was beautiful and I was overwhelmed by the possibilities.  I watched it three times over the next four days.  Obsess much???  🙂  It was exactly what I was looking for, and meshed perfectly with the method I was using.  Can’t really ask for more than that!

The documentary is called The Permaculture Orchard:  Beyond Organic.  I had an idea of what permaculture was prior to watching the film, but I had no clue what it looked like in action or just how much there was to it.  If you don’t know what permaculture is, (and WordPress clearly doesn’t since it is giving me the red underlines of idiocy every time I type it) in the simplest terms it just means working with, rather than against nature in a sustainable manner.  They used the term in Back to Eden, but before then I had never heard of it.  No chemical pesticides, herbicides, or insecticides always gets my attention.  🙂

This would probably be a more exciting post in the spring when I could fill it with pictures of flowers and pretty herbs, but since I am starting to implement this now, and we just talked about starting the orchard, I thought I’d go ahead and share.  We’ll be doing tons more in the spring, so I promise you’ll get all those pretty pictures.  So I KNOW 😉 you are just dying to know what I’ve done so far.  My order of garlic (Music variety) that I placed in the spring just came in, and I went to my local farm stand and bought another bulb of the yummy garlic we’ve been enjoying from them.  I’m planting a full bulb’s worth of cloves of each of those in various places around my trees.  Yummy for us, but will help to ward off animals and insects.  I also got my hands on some Egyptian Walking Onions that I am going to plant out there as well, for the same reason as the garlic.  It’s a neat little plant that I’ve wanted to try since last fall.  The longer I garden, the more interested I become in finding as many perennial (comes back every year) or self re-planting (I believe I have warned you I make up words and terms all the time, so don’t write to me about self re-planting 🙂 ) plants that can help me create a wonderful, sustainable garden with less effort and money on my part.

I divided up some of my chives and oregano that were really out of control growing too well in my window box and needed to be pulled out to give them some space.  Some of my strawberry runners that had rooted in the wrong places got dug up and also put out there.  I found some Yarrow, Salvia and Echinacea (coneflower) neglected and unloved on a clearance cart at the nursery.  They aren’t pretty now, but they should come back beautifully next year, and the bees and butterflies will love them.

Diversity is very important in permaculture.  Mono crops are causing so many problems with disease and pests.  Our little orchard already has many different varieties of apple trees, but will also have peach, pear, mulberry, fig, plum, cherry, crab apple and paw paw.  I know choosing varieties of trees has been a struggle of mine, and I have done tons of reading and taken lots of suggestions.  I am going to add a page to the blog here with a list of all of the varieties of trees and plants in the orchard for you all to use as a reference.  It’ll be an ongoing process, and I’ll update it with pros and cons and opinions regarding growth and fruit production and taste as time goes on.  Hopefully it will be helpful for some of you with your decisions when you plant.

Much, much more on this to come.  If you would like to watch the film, I am going to attach the trailer right below, or you can order and watch here  (This post does NOT contain any affiliate links.  I am not being compensated for sharing this film in any way.  The same applies to the Back to Eden film.  I just find them both wonderful and am using their methods in my gardens and want to share).

The Permaculture Orchard: Beyond Organic

Have a great week everyone!!

sign off green

Super Fan Giveaway

Our Facebook page recently went over 500 fans!  I was so excited and so grateful to hit this milestone.  I can’t even begin to thank you all enough, but I can give one lucky fan a super fun prize.  🙂

giveaway

One winner will receive a gift package that includes:

~A Back to Eden film DVD.  It is a beautiful documentary detailing a simple, natural gardening method that models nature.  It’s what I use in my garden and little orchard.  The results are nutrient dense food with very little weeding or watering.  The method and film are amazing.  (Even if you don’t win, you can watch it free on the Back to Eden film website).


~Five packets of seeds from Botanical Interests.  These were some of my very favorite varieties I grew in my garden this year.  Cherokee Purple Tomato, Lemon Cucumbers, Purple Petra Basil, Borage, and Sugar Snap Peas.  I’m also going to throw in some seeds that I saved from my monster marigold plant that grew in my garden this season.  It was so huge and gorgeous.  Hopefully these will be some of your favorite varieties next year.

~A jar of my favorite bath salts that I made in this post.  It’s total bath bliss.  🙂

The rules are simple.  The giveaway will run until 11:59 p.m. EST September 24, 2014.  Winner will be chosen and notified the following day.  You can earn up to five chances to win.  You may not enter more than once under each category, and I will check to make sure you followed the rules.  I don’t like cheaters.  😉  You must be 18 to enter and live in the continental U.S..  (Sorry international peeps.  Maybe next time I can swing it).  You must provide a valid email address when you submit your comment so that I can contact you.  (This doesn’t post with your comment, so don’t worry about privacy).  The winner will have 48 hours after I send them an email to reply with their mailing address.  If I don’t hear from the winner in that time, I will choose another winner.  Winner will be chosen at random.

How to Enter (You may earn one entry for each item below.  Do just one, or all five.  It’s totally up to you).

1.  Comment on this post below telling me what was your favorite thing you grew in your garden this year.  If you weren’t able to garden, then tell me what your favorite homegrown fruit or veggie is.  Maybe you can help me choose some new varieties to try next year.  This comment earns you one entry.

2.  Subscribe to this blog by entering your email address into the field on the right.  You will receive an email every time I post so you never miss anything new.  I promise no spam.  Comment below letting me know you’ve subscribed and you get another entry.

3.  “Like” Walking Softly Upon the Earth on Facebook here, come back and comment below telling me you’re a fan.  Already liked my page?  Just tell me you are already a fan.  I’m not going to leave you out!  🙂  Earns you one entry.

4.  Follow me on Pinterest here, come back and comment below telling me you’re following.  If you are already following me on Pinterest you get another entry by telling me you are already following.  I love me some Pinterest.

5.  If you are on Twitter, you can follow me here and comment below for another entry.  I am embarrassed by my lack of Twitter knowledge, so forgive me if I fumble as I learn.  🙂

That’s it.  Good luck!!!!

sign off green


Mount Mulch-more

Sorry.  Sometimes when thinking of a blog post title I’m overcome with cheesiness.  I can’t help it.  I type the first stupid thing that jumps into my head and there’s no changing it, no coming up with a replacement, no tweaking it and making it better.  It’s like it’s super-glued to the screen and can not be removed.  My SEO scores are always ridiculously low because I don’t title posts properly and I can literally hear readers’ eyes rolling as they see the titles pop up.  If I were to write a book one day, it would never get picked up by a publisher due to whatever stupid title I chose for it.  I accept this flaw in myself and hope you still read my posts after you’re done rolling your eyes.  🙂

opening image for orchard

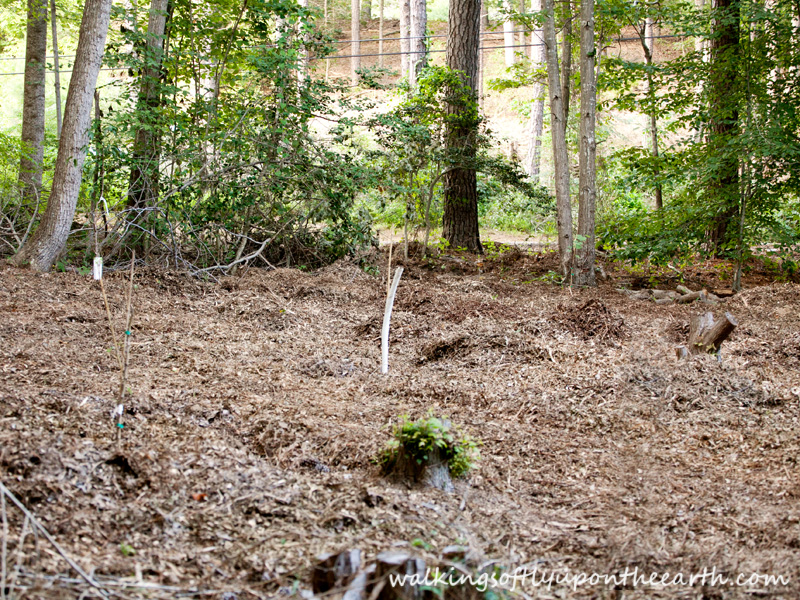
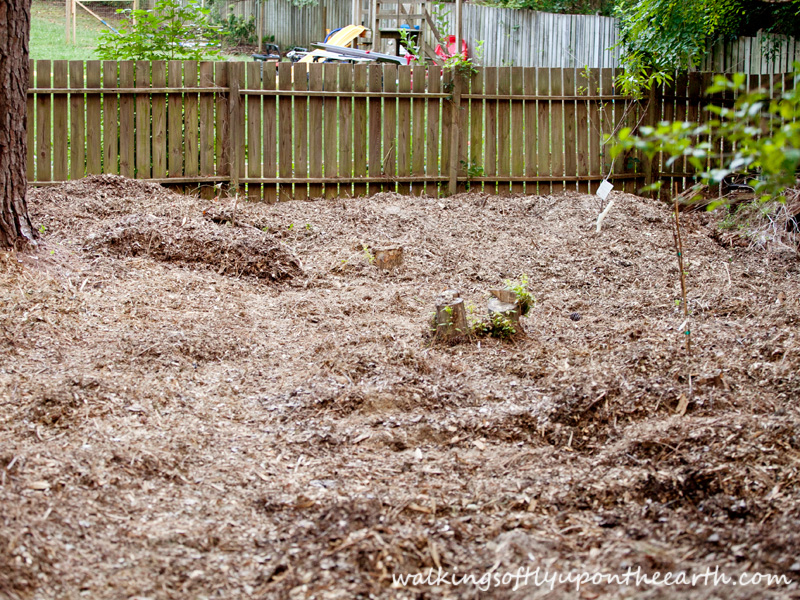
So we’ve had multiple crews from a tree removal service for the power company in our neighborhood for months now trimming the trees around our power lines.  I left my address with no less than three of them begging them for a load or two of wood chips so that we could put a covering on the area in our woods (behind the garden) that we cleared this spring to make room for a little mini orchard.  Nothing happened.  My Super Awesome Husband talked to a crew one day and we got a huge load the very next day.  I was soooo excited.

photo(3)

Then we got another load.  WOWEE!!  This is great, I thought.  Exactly what we wanted!!

photo(4)

Then I came home to a third pile.  Well, okay.  Now we can maybe mulch a nice path along the fence so I can easily walk back to the orchard.  By the time I came home to pile #4 I was starting to get concerned about all of the work involved in moving the chips.  #5?  They can’t possibly dump any more.  That load needed to be shoveled and swept from the road.  There is NO more room.  WHAT must the neighbors be thinking???  #6  #@&#@  @#%&@@!!!  Why are they still doing this?  #7 I got home with the kids and stared at the mountain and laughed.  It was beyond absurd at this point.

photo(10)

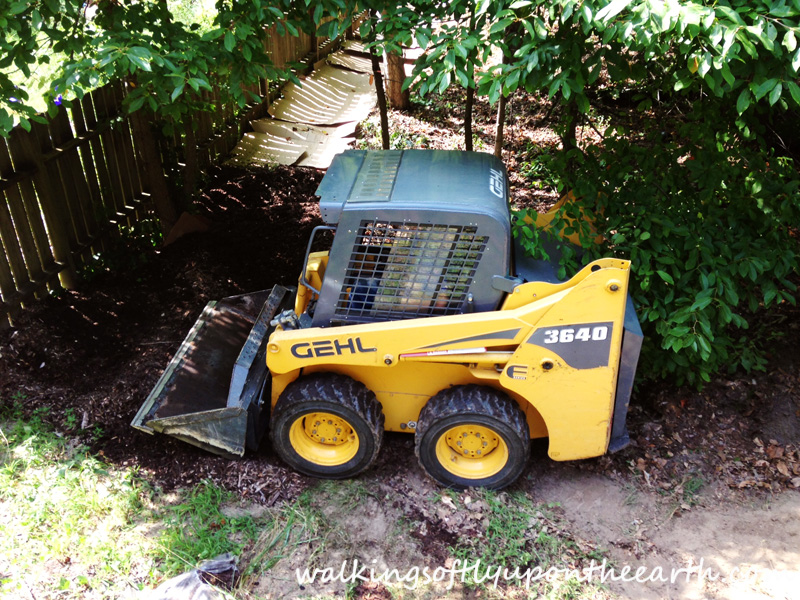
That last photo?  Not all of it.  They put some in the woods off to the left.  There was no way possible for me to move it all with shovel and wheelbarrow like I had two years ago when I started Back to Eden gardening.  We had to borrow a bobcat.  I even got a visit from the HOA office at this point.  “Good morning.  Is, uh, this all yours?  We’ve had a few complaints from your neighbors.”  Nice.  Gotta love HOAs.  Luckily the bobcat was in the yard waiting for the weekend at this point, so I just gestured in that direction.  I had to eventually put a sign in our yard so that they wouldn’t bring us any more.

I’m off topic again.  Another flaw.  I write the way I think.  Welcome to my head.  Scary, isn’t it?  🙂  Back to Eden gardening.  Quite possibly one of the best decisions I’ve ever made was to watch this film.  It’s free to view online, so you have no excuse whatsoever not to watch it yourself here.  You can also purchase a copy if you aren’t able to watch it online, or if you’re like me and want watch it over and over.  When you are done watching it five times, you’ll still want more, so I totally recommend the garden tour videos and interviews with Paul that are done by L2Survive on YouTube.  You can find those here.  If you fall completely in love with the idea and want to try it yourself, I am a member of an awesome group on Facebook that you can request to join here.  Gardeners rock!

The method is sooooo simple.  It just models nature.  If you look in a forest, the ground is never bare.  It is always covered with composting leaves, needles, plants and fallen trees.  With this method you never, ever till (this makes someone in my house VERY happy), you just cover.  If you are planting over weeds or grass you lay down a layer of newspaper, then compost (if you are planting right away) then wood chips.  We are not talking bagged mulch or bark, but chipped branches of trees that are mostly leaves and needles.  That is a very basic rundown.  Watch the film to get all of the reasoning and see the results.  For me it has meant very little weeding, hardly any watering, beautiful, healthy plants and delicious veggies.  I can’t say enough wonderful things about it.

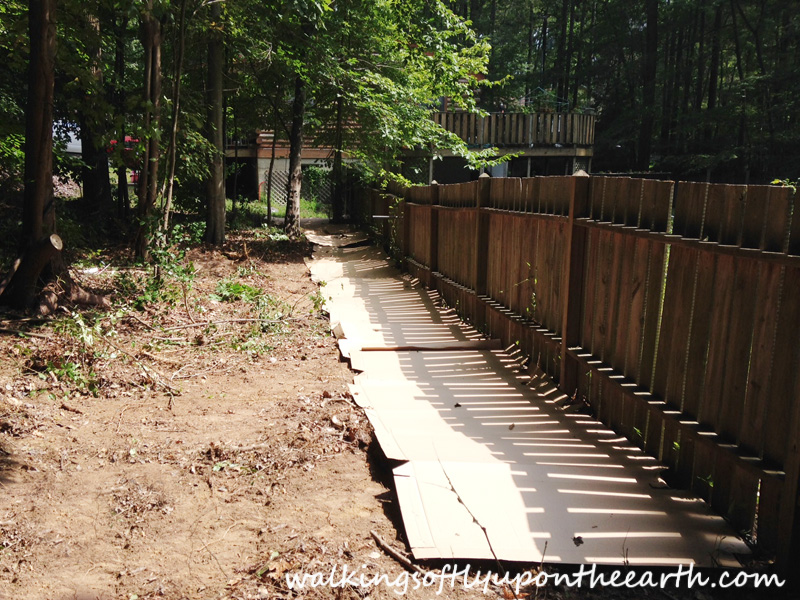
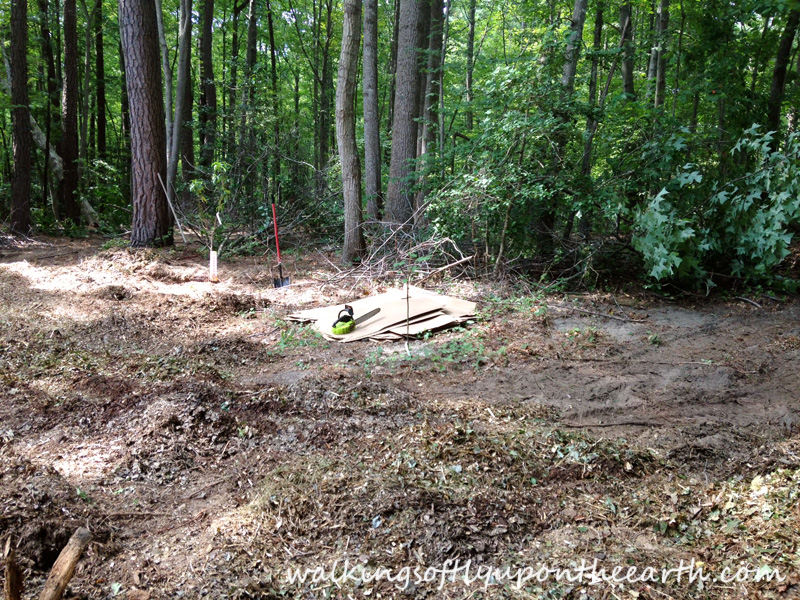
We used cardboard along the path we made to the orchard to block the weeds.  We won’t be planting here, so I don’t have to worry about how long it takes to break down.  All I wanted cleared was the area the cardboard is laying on, so I could walk back without having to walk down the road.  The Super Awesome Husband cleared extra space to the left and I was THRILLED to have that extra room for some blueberry bushes and raspberry canes.

photo(18)

You can see little patches of weeds here and there, so they got a little cardboard treatment too.

photo(19)

Then the wood chip moving began.

photo(16)

Thank heavens for my Super Awesome Husband and this little machine.

photo(14)

I even got in on the action!  When I wasn’t worried I’d run over one of my little trees or terrified I’d hit a big one, this was FUN!!  🙂

photo(12)

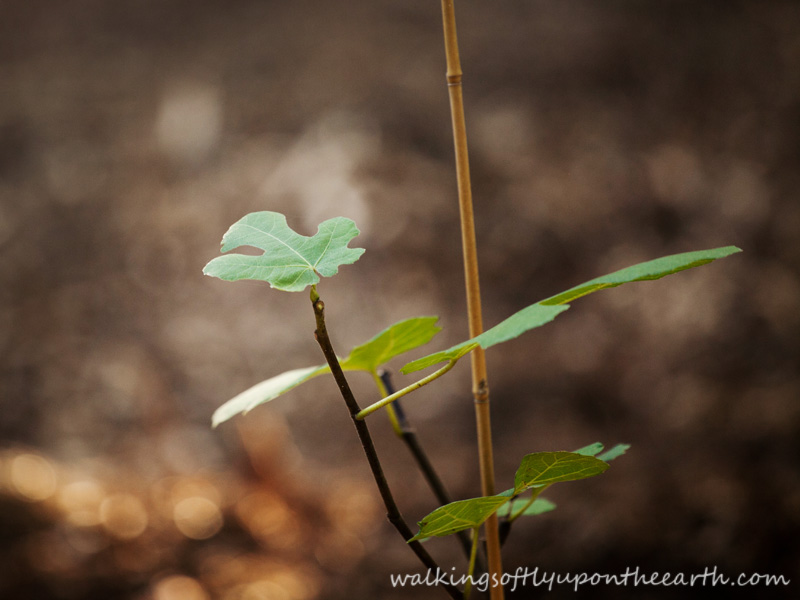
“Someone” had a moment of non-super-awesomeness and bent my little fig tree over.  Hopefully it will be okay.

IMG_9939

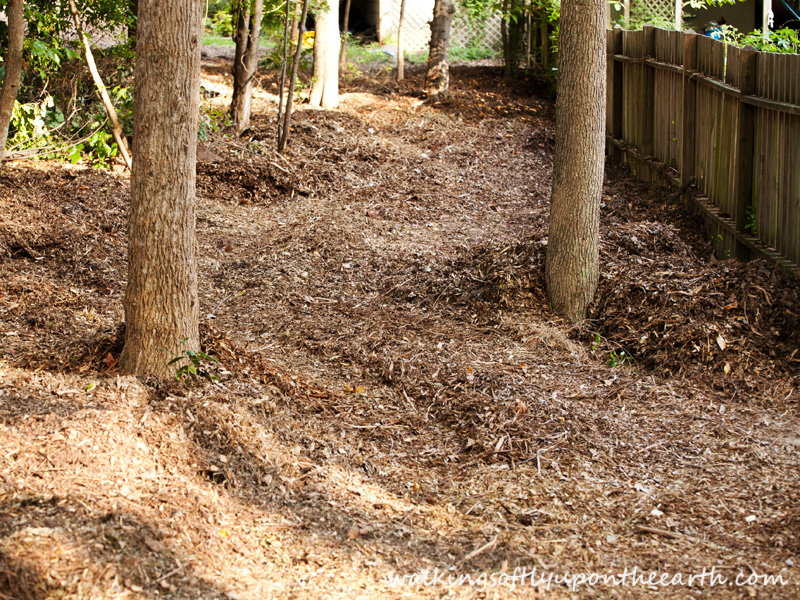
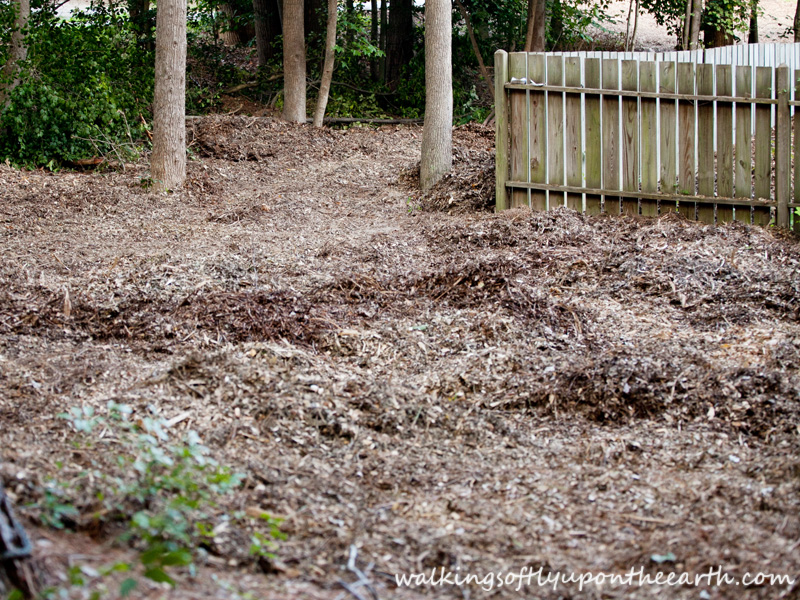
The path looks fantastic!!  And look at all that extra space!!  Woo Hoo!!

IMG_9962

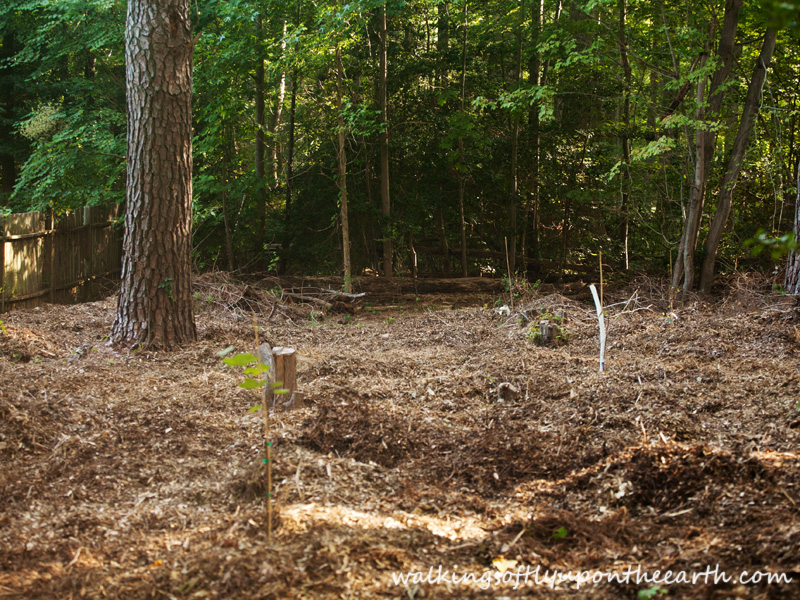
I have a lot of raking to do to smooth the piles a bit, but I was done being attacked by a bazillion chiggers, so that will save for a day this fall when the cold weather has killed the little demons.  “Some” people are tired of my whining, but here we are five days later and I am still itching like a maniac with the pox.  I don’t recommend it.

IMG_9949

IMG_9955

For the record, that’s a LOT of freakin’ wood chips people.

IMG_9953

My magical little orchard at the edge of the forest.  I’m so excited for the gifts it will provide.

IMG_9934

Gardening really is a lesson in faith and hope and patience.  You have to believe that all the work you do will lead to great reward, you must hope that everything goes well and that you’ve done all that you need, and you must wait patiently while the little trees sink their roots deep and bear fruit, or for the tiny seed to grow and flower.

IMG_9948

sign off green


Kicking the Chemicals~Bath & Shower Products

top image

My post about my balls, I mean my DRYER balls 😉 has been so popular that I think I am going to do a little series we are going to call Kicking the Chemicals.  As you’ve heard I am doing my best to rid my home of as many harmful chemicals as I can. We’re talkin’ house cleaners, people cleaners, moisturizers, air fresheners, well, you get the picture. So let’s get this party started!!

As a mom of three, my days are busy and insanely nuts a little crazy sometimes.  My *me* time is my bath in the evening.  Kids go to bed.  Mom takes a bath.  Sometimes I take a good book in and read while I soak, and others just close my eyes and totally relax.  A nice, hot bath is awesome, but a yummy smelling one is even better, so I’ve been a bit of a bubble bath, bath bomb, bath salt, bath oil, etc., collector.  Then I read the ingredient list on one.  Well, if that wasn’t a bummer I don’t know what is.

First, I needed a good exfoliating scrub for the shower.

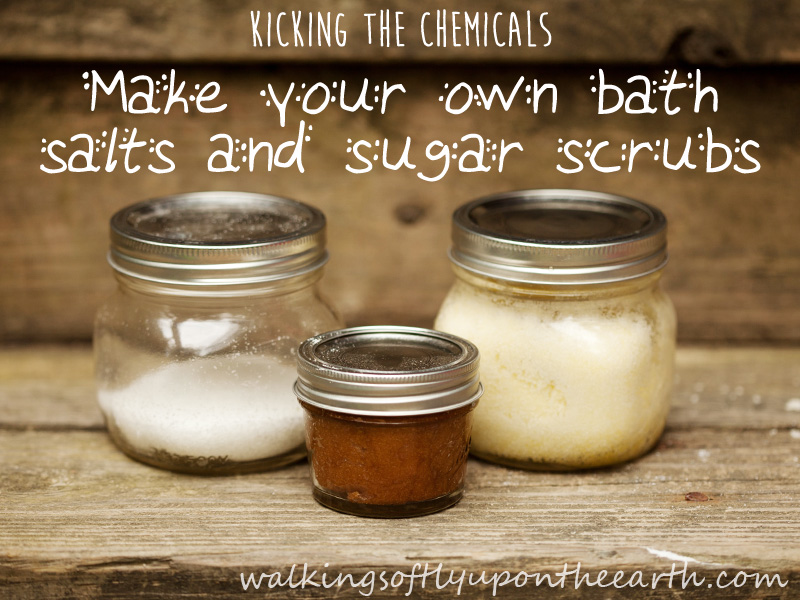
Sugar Scrub

1 Cup Sugar

3-4 Tablespoons of oil (olive oil or grapeseed oil are my favorites for this)

5 drops of essential oil

Or

1 cup brown sugar

1/2 cup liquid coconut oil

5-8 drops of essential oil

My favorite scent for this is 4 drops of Lavender Essential Oil + 8 drops of Lemongrass Essential Oil, but use what you like.  The good thing about this is you can also make the scent as soft or strong as you like.  Big bonus for someone like me who is super sensitive to fragrance.

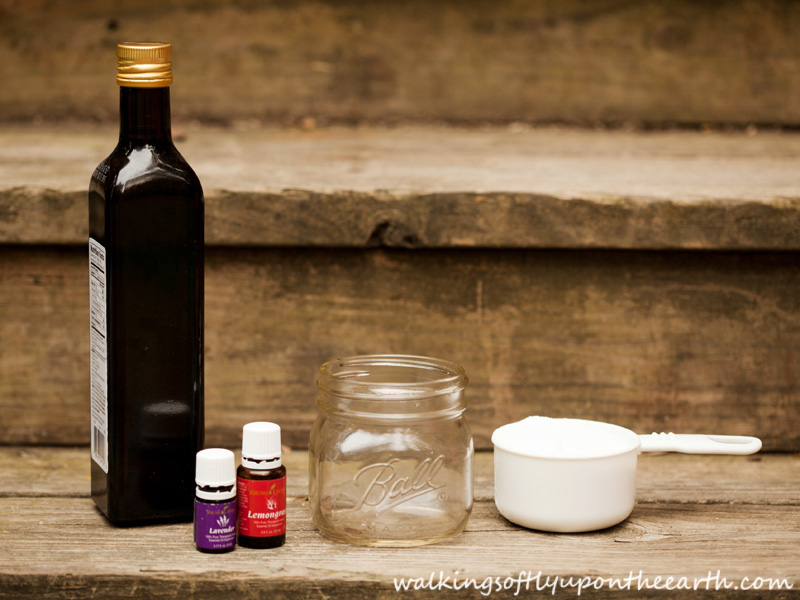
IMG_9859

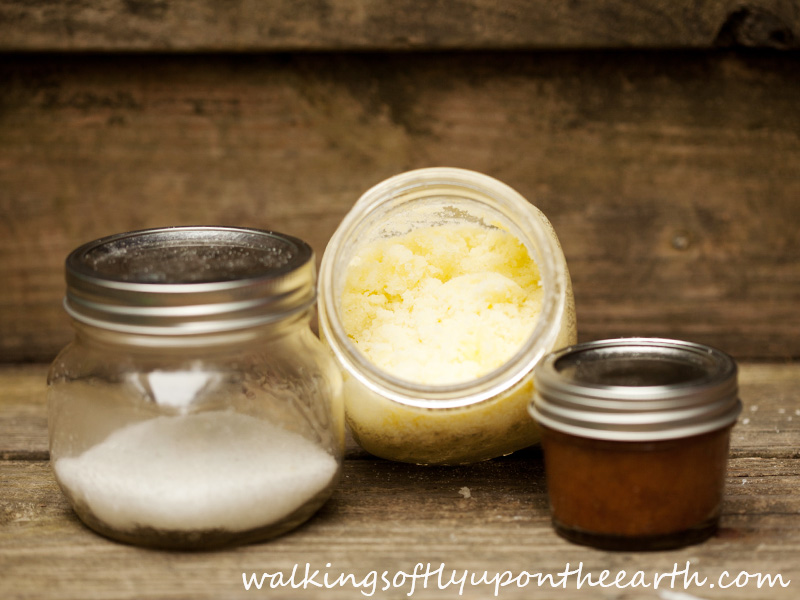
Gather your ingredients and add your oil and essential oils.

IMG_9869

Mix well and you are ready to go!  A little goes a long way, so take it easy the first time you use it so you don’t waste a bunch.  Also, if you don’t have a non-slip mat in your bath, be careful while you are showering and spray the floor down when you are finished so that the next person doesn’t end up with crazy slippery floor.  Because chances are fairly decent it will be you, and you don’t want to recreate the Bambi on ice scene the next time you step in the shower.  Not speaking from personal experience of course….  (insert guilty whistle here)

IMG_9870

Next came scenting my beloved baths.  Epsom salts are fantastic for baths!  Be sure to drink lots of water before and after!  FYI The bath salts don’t make my tub slippery like the sugar scrub does.  No Bambi.  🙂

Bath Salts

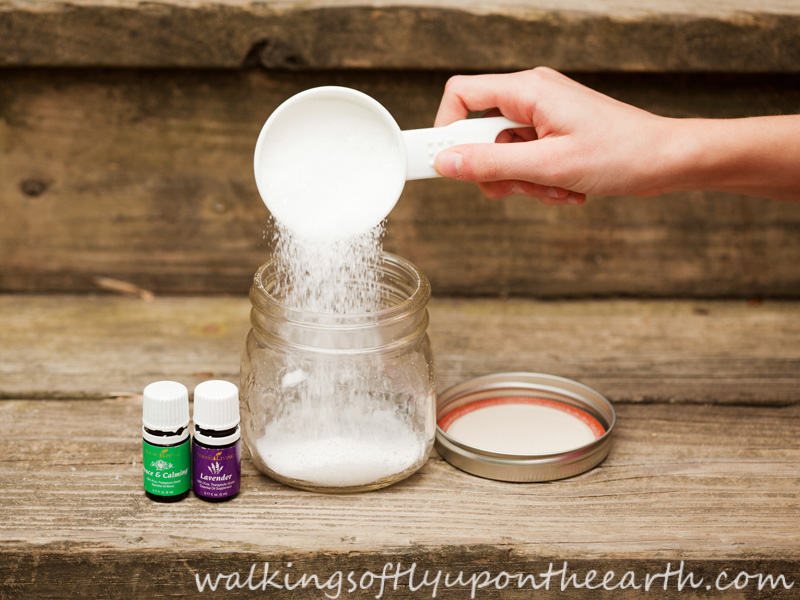
1/2 cup Epsom Salt

4-6 drops of essential oil

Directions:  This couldn’t be simpler.  Dump your epsom salt into a container.  (The above amounts make enough for one large tub or two regular sized tubs so make as much or as little as you like).

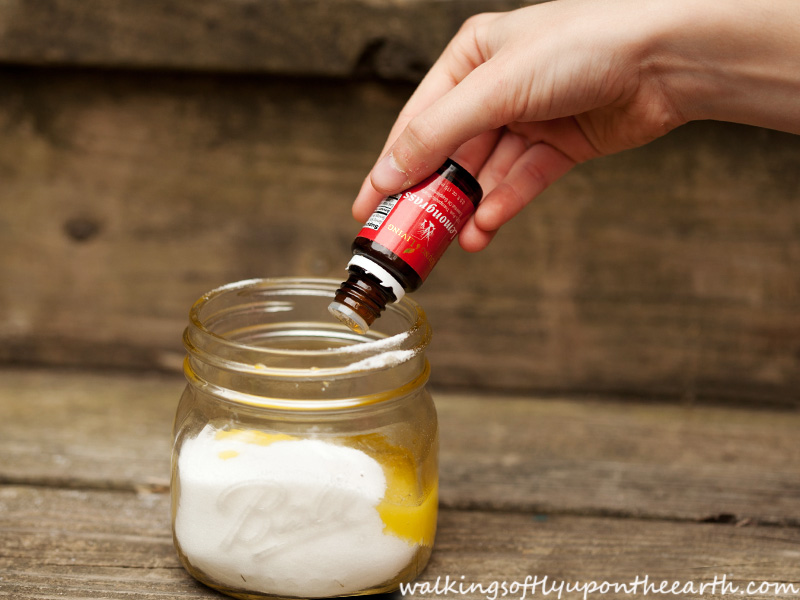
IMG_9846

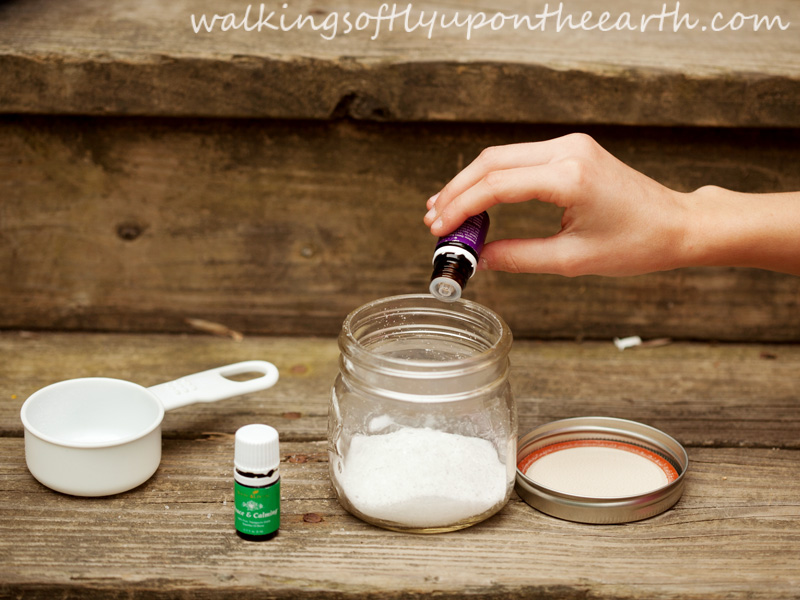
Add your favorite essential oils for scent and to help anything that ails you.  My favorite combination for a super relaxing bath experience is Lavender and Young Living’s Peace & Calming.  Sigh.  Heaven.

IMG_9848

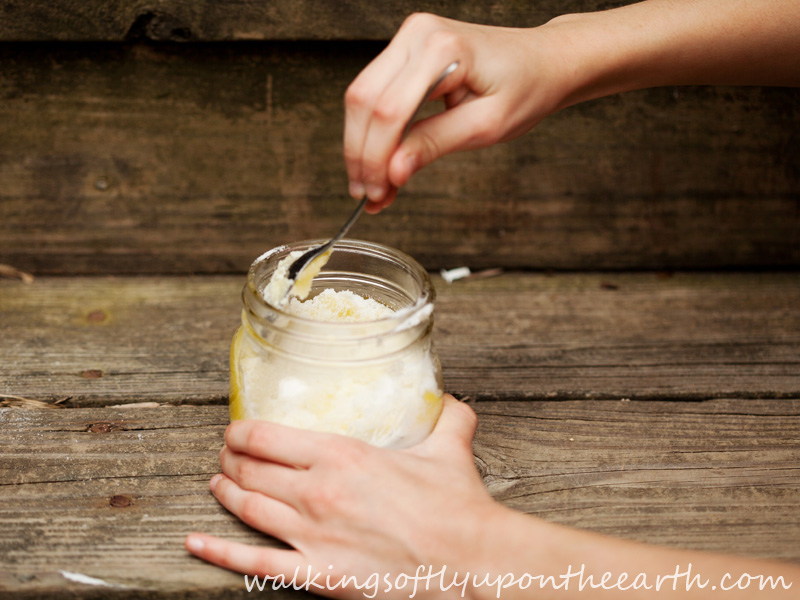
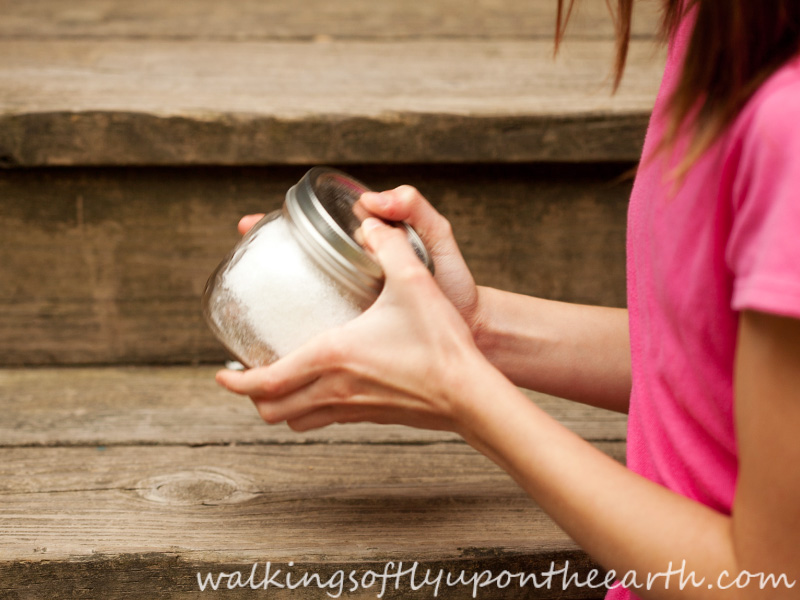
Put the lid on and shake that bad boy up!

IMG_9853

I wish you could smell the yummy-ness!

IMG_9873

These make super fantastic gifts as well.  I just got an email this week from my old favorite online body and bath product site saying they missed me.  Cringe.  I told you I had a problem.  🙂  We actually had a package from them delivered to our house that should have ended up down the street.  My Super Awesome Husband shook his head and told me that means I ordered too much from that company if the FedEx driver just assumed it was mine.  🙂  And now, my friends, I am reformed.

If you would like more information about Essential Oils you can click here, or shoot me an email from the contact page above or directly to [email protected] and I would be happy to answer any questions you might have or send you a free sample.

Have a great weekend!  🙂

sign off green

How I got my husband to look at me like I’m nuts…today

walkingsoftlyupontheearth

My Super Awesome Husband looks at me like I’m nuts several times a week.  Okay, okay.  If I’m being completely honest, it’s probably more like several times a day with a few good eye rolls behind my back thrown in for good measure.  What raises him to Super Awesomeness is that he is totally supportive (despite the eye rolls) and such a good sport through my crazy ideas, even if most of them often lead to crazy amounts of physical labor on his part.
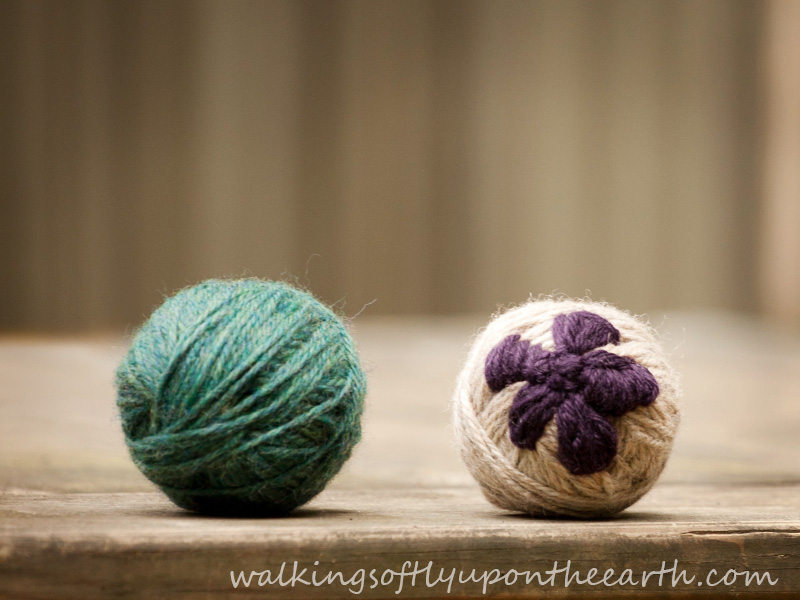
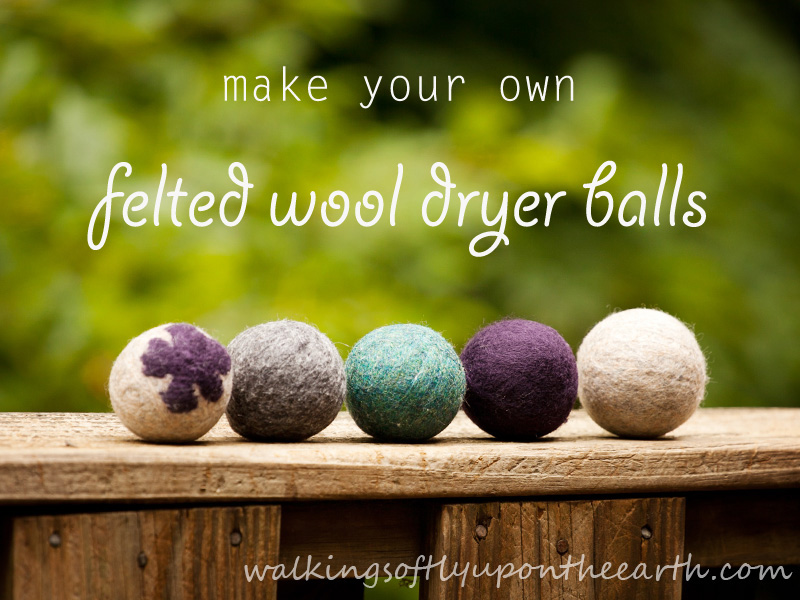
I’ll admit, there are times I think of something to mention or do, just to make him shake his head and roll his eyes.  It’s fun.  Ha Ha!  Today I made him look at me like I’m nuts by making felted wool dryer balls.  “You’re making what?” asks Super Awesome Husband.  “Dryer balls”  I tell him.  “And what are dryer balls?”  he asks with that look on his face that I love.  😀  Ah, life is good!
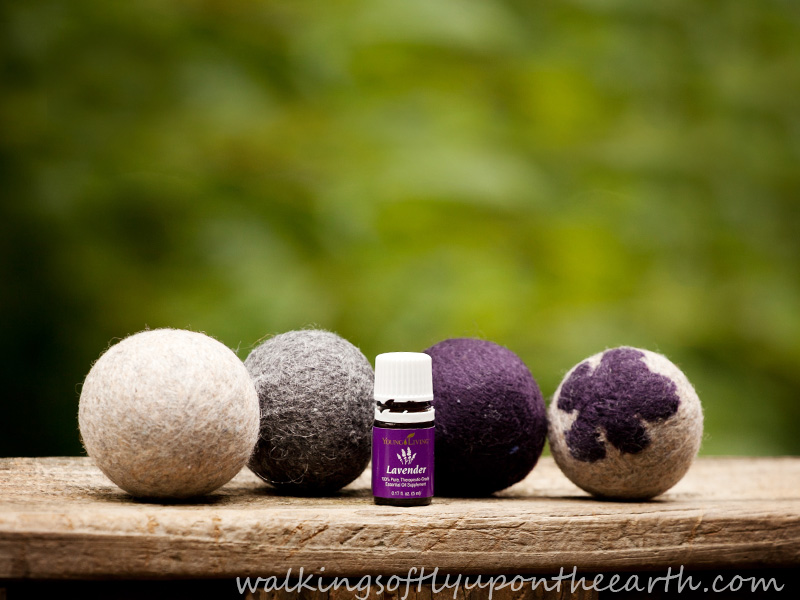
So today’s project is part of my mission this year to remove chemical filled products from my home.  Luckily for the Super Awesome Husband it requires 0 labor on his part.  🙂  Dryer sheets are full of chemicals and cost money.  Dryer balls are super simple to make, help your clothes dry faster, reduce static and make your clothes less wrinkly and smell nice without all of the chemicals.  All you need to make them is some 100% wool yarn that states hand wash and lay flat to dry on the label.  If you use machine washable yarn it won’t felt, and you need it to felt.  You also need one leg of pantyhose and a blunt needle to sew in your end.

Take your yarn and wrap it into a ball the size of a tennis ball.  Take your blunt ended needle and sew in the end really, really well.  If it’s not done well enough, your ball will unwind and you’ll end up with a felted mess.  If you are really creative or good at forgetting what you can and can not do well,  you can stitch a pretty design on your ball.  I mentioned this to my daughter and she, of course, thought it would be a great idea to have a flower on the one she made.  Let’s just say, every time I sew I remember why I don’t sew.  Next time something might involve sewing, my mom will be called.  Don’t go making fun of my flower!  I mean it!

IMG_9471

Are you done laughing yet?  I totally should have let my daughter do it herself.  🙂

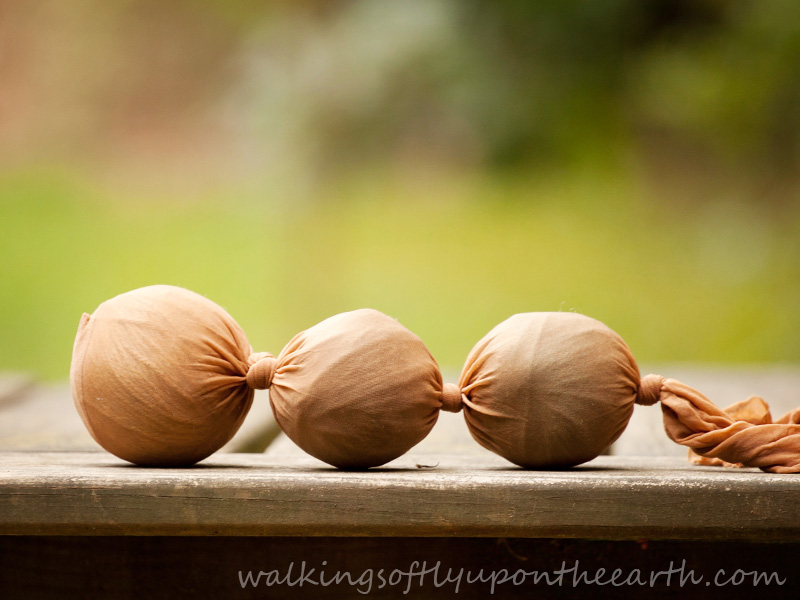
Load all of your balls in to one leg of a pair of pantyhose that you cut off, and tie a knot in between each one.  Try to keep your male children away from them.  It’s an irresistible, fierce, ninja weapon at this point.

IMG_9473

Throw your balls into the washer and wash on hot with as much agitation as your washer offers.  Dry them on high as well.  If you don’t use super dark colors for your dryer balls and have super light colored towels or sheets you can save water and electricity by washing and drying them with your sheets and/or towels.  You will need to do this 2-3 times to get the balls nicely felted.

IMG_9510

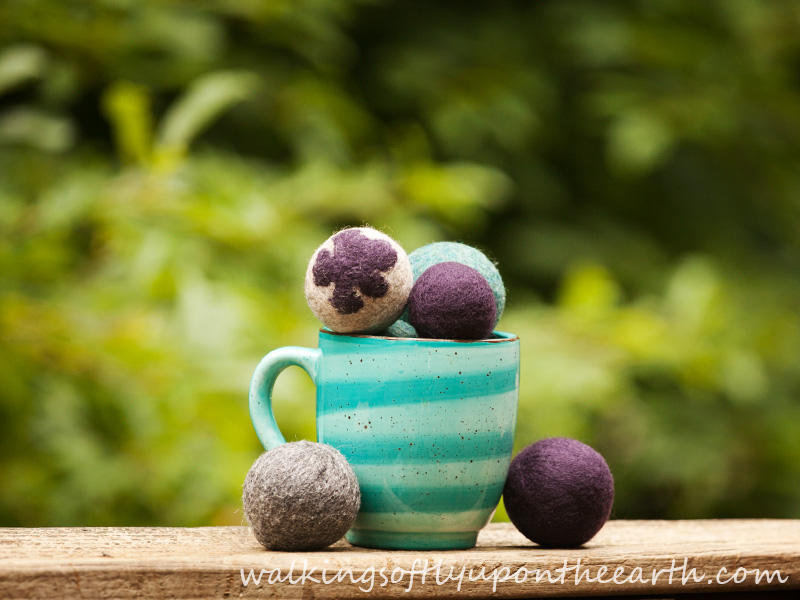
Now to use them you just toss 4-6 balls (depending upon how big of a load you washed) into your dryer with your wet laundry and dry.  The wool will absorb some of the water and help you laundry dry faster.  It will also keep the humidity high while releasing it, which will help with wrinkles.  Dryer balls keep the static down and, it you add a drop of your favorite essential oil to each ball, will freshen your laundry and make it smell fantastic!

IMG_9518

I have fallen in love with Young Living Essential Oils, so if you’ve been wanting to try some as well, shoot me an email and I’d be happy to send you information and a sample!  You can use the contact page of the blog or email directly to [email protected]

I want to send a virtual high five to anyone who has made it through this post without giggling at all of the sentences with “your balls” in them.  You are a much better, more mature person than I, and I commend you!!  To those who have been giggling like a middle schooler, you get a high five too, because, well, we all have our issues.  😉

DISCLOSURE:  This post may contain affiliate links, and I may receive compensation for sharing products and information on this site.  All thoughts and opinions are my own.  See this page for full site Disclosure.