Author Archive: Walking Softly Upon the Earth

Kicking the Chemicals~Bath & Shower Products

top image

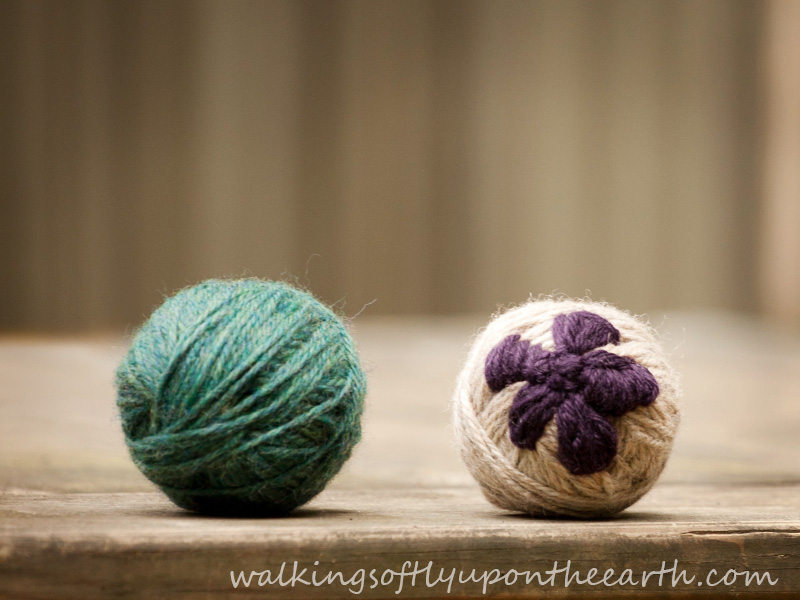
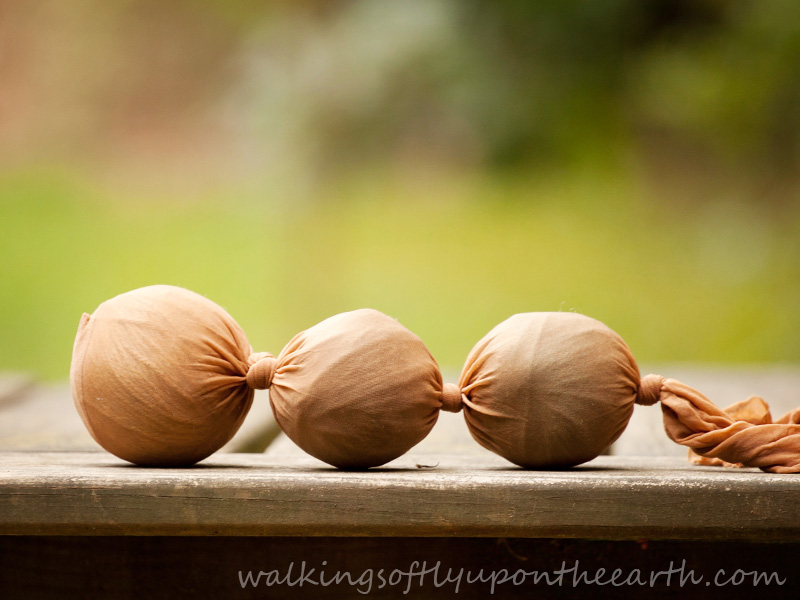
My post about my balls, I mean my DRYER balls 😉 has been so popular that I think I am going to do a little series we are going to call Kicking the Chemicals.  As you’ve heard I am doing my best to rid my home of as many harmful chemicals as I can. We’re talkin’ house cleaners, people cleaners, moisturizers, air fresheners, well, you get the picture. So let’s get this party started!!

As a mom of three, my days are busy and insanely nuts a little crazy sometimes.  My *me* time is my bath in the evening.  Kids go to bed.  Mom takes a bath.  Sometimes I take a good book in and read while I soak, and others just close my eyes and totally relax.  A nice, hot bath is awesome, but a yummy smelling one is even better, so I’ve been a bit of a bubble bath, bath bomb, bath salt, bath oil, etc., collector.  Then I read the ingredient list on one.  Well, if that wasn’t a bummer I don’t know what is.

First, I needed a good exfoliating scrub for the shower.

Sugar Scrub

1 Cup Sugar

3-4 Tablespoons of oil (olive oil or grapeseed oil are my favorites for this)

5 drops of essential oil

Or

1 cup brown sugar

1/2 cup liquid coconut oil

5-8 drops of essential oil

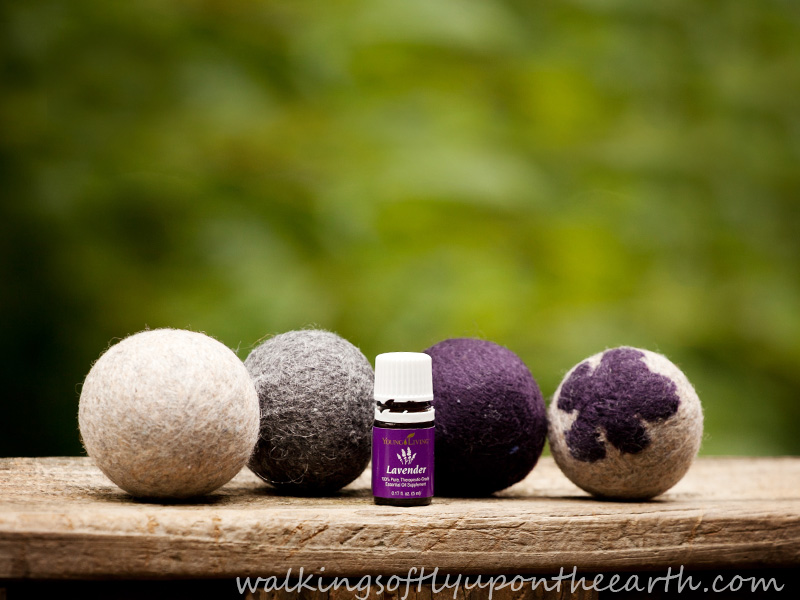
My favorite scent for this is 4 drops of Lavender Essential Oil + 8 drops of Lemongrass Essential Oil, but use what you like.  The good thing about this is you can also make the scent as soft or strong as you like.  Big bonus for someone like me who is super sensitive to fragrance.

IMG_9859

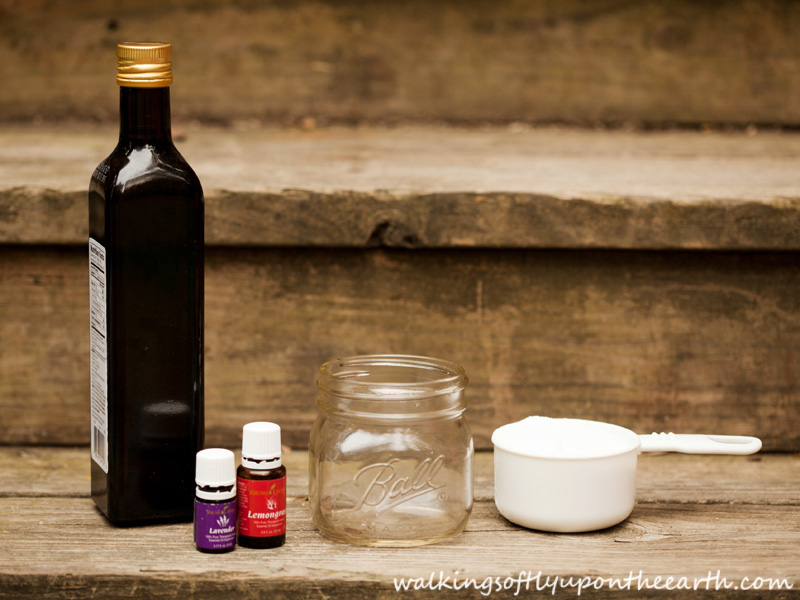
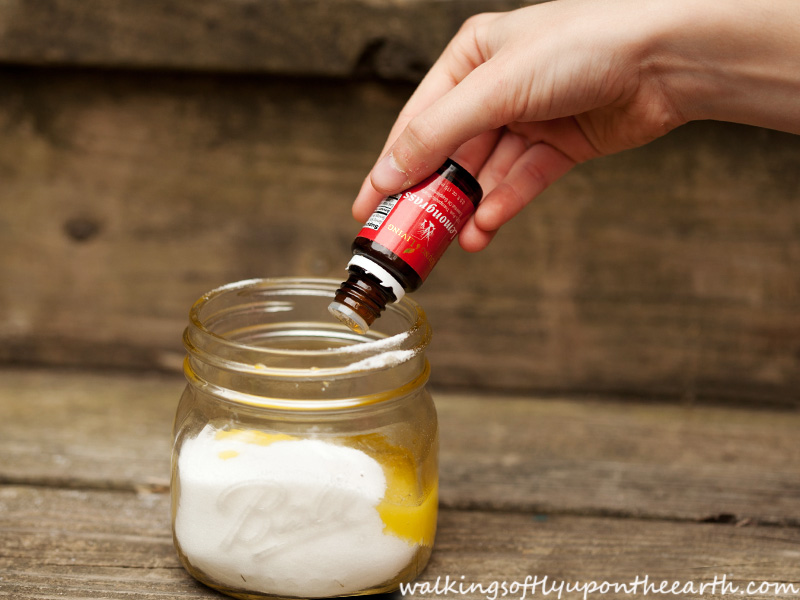
Gather your ingredients and add your oil and essential oils.

IMG_9869

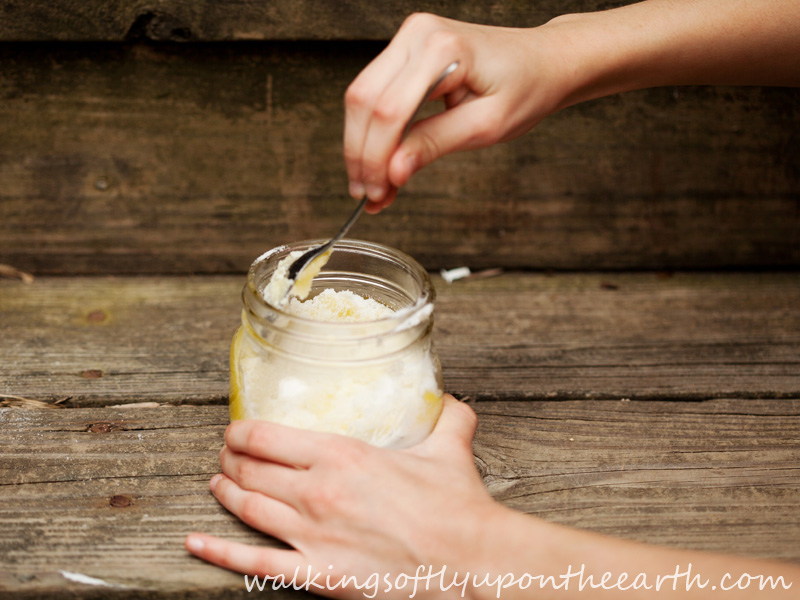
Mix well and you are ready to go!  A little goes a long way, so take it easy the first time you use it so you don’t waste a bunch.  Also, if you don’t have a non-slip mat in your bath, be careful while you are showering and spray the floor down when you are finished so that the next person doesn’t end up with crazy slippery floor.  Because chances are fairly decent it will be you, and you don’t want to recreate the Bambi on ice scene the next time you step in the shower.  Not speaking from personal experience of course….  (insert guilty whistle here)

IMG_9870

Next came scenting my beloved baths.  Epsom salts are fantastic for baths!  Be sure to drink lots of water before and after!  FYI The bath salts don’t make my tub slippery like the sugar scrub does.  No Bambi.  🙂
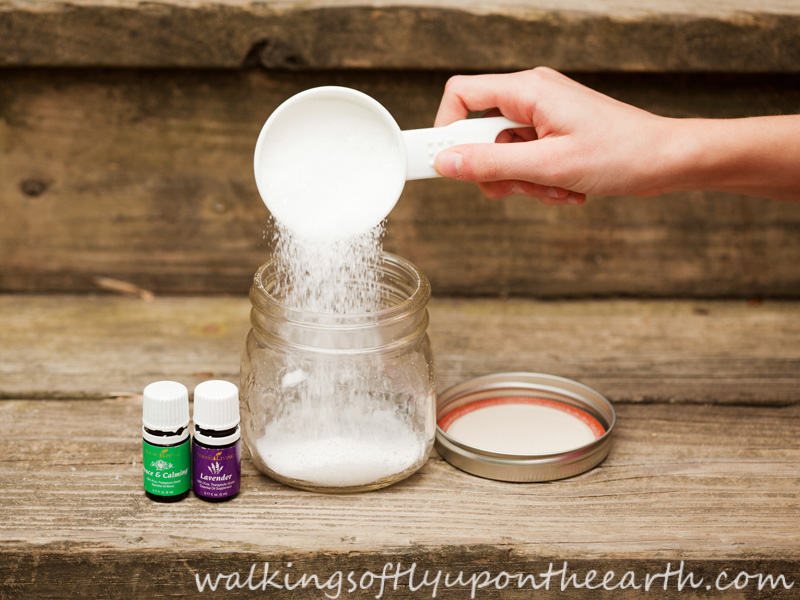
Bath Salts

1/2 cup Epsom Salt

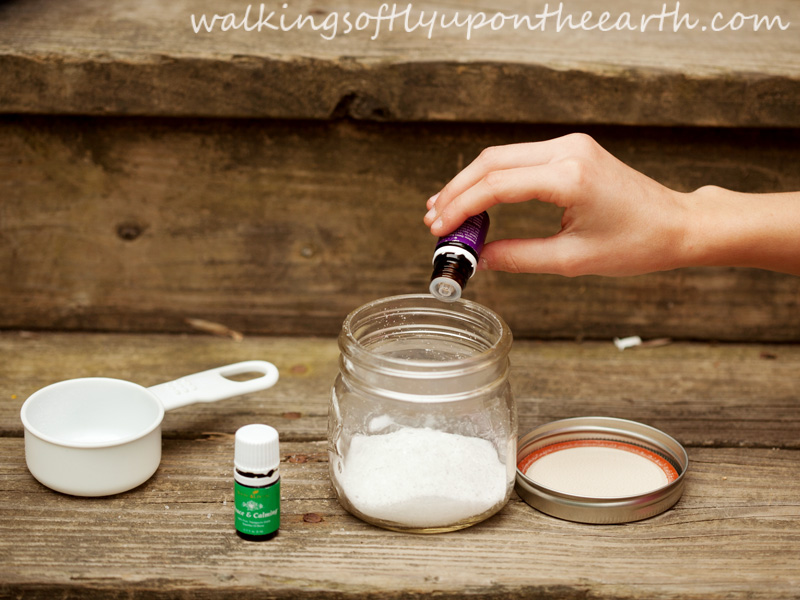
4-6 drops of essential oil

Directions:  This couldn’t be simpler.  Dump your epsom salt into a container.  (The above amounts make enough for one large tub or two regular sized tubs so make as much or as little as you like).

IMG_9846

Add your favorite essential oils for scent and to help anything that ails you.  My favorite combination for a super relaxing bath experience is Lavender and Young Living’s Peace & Calming.  Sigh.  Heaven.

IMG_9848

Put the lid on and shake that bad boy up!

IMG_9853

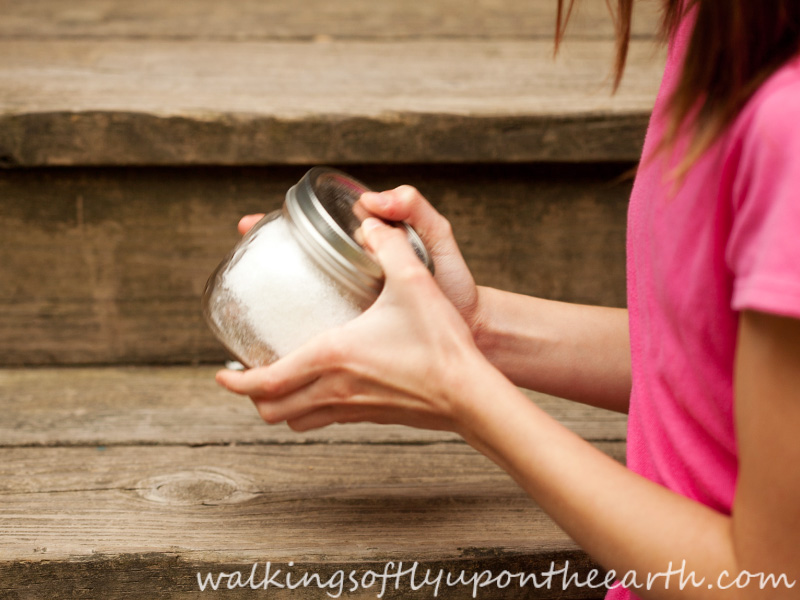
I wish you could smell the yummy-ness!

IMG_9873

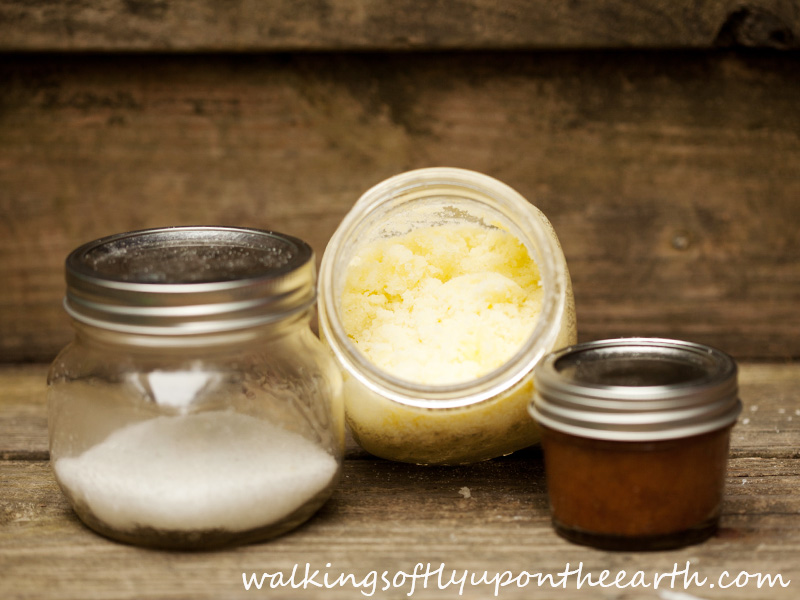
These make super fantastic gifts as well.  I just got an email this week from my old favorite online body and bath product site saying they missed me.  Cringe.  I told you I had a problem.  🙂  We actually had a package from them delivered to our house that should have ended up down the street.  My Super Awesome Husband shook his head and told me that means I ordered too much from that company if the FedEx driver just assumed it was mine.  🙂  And now, my friends, I am reformed.

If you would like more information about Essential Oils you can click here, or shoot me an email from the contact page above or directly to [email protected] and I would be happy to answer any questions you might have or send you a free sample.

Have a great weekend!  🙂

sign off green

Kickin’ Corn Relish

title image

If you follow me on Facebook or Instagram, you saw a couple of photos last week of my very first canning adventure.  In case you aren’t following me yet (and shame on you if you’re not!!!) here is the gorgeousness that was my tomato harvest one day:

photo(9)

I’ll let you in on a little secret.  I am a completely fearless gardener.  I jumped right in full force, will try anything and everything, and even though I hope it all works out I’m not hesitant at all just because it may fail miserably.  Canning on the other hand?  I was terrified to try it.  Truly.  I worried about it being too complicated and not doing it right, making my family sick because I messed it up or ruining a whole bunch of delicious food that I poured my heart into growing.  That’s a LOT of pressure people!!!  Well, I’m quite embarrassed now because, well, it’s pretty dang simple.  🙂

I took a look at all those beautiful tomatoes and wanted fresh salsa.  At a friend’s suggestion I went simple and used Ball’s Zesty Salsa Recipe.  It is sooooo delish!

photo(7)

So while eating some of that yummy fresh salsa, I was reminded a tiny bit of the corn relish that my mom used to make when we were kids.  My brother and I used to tear that stuff UP!!!  Mmmm.  I figured while I’m sitting here still all confident from my canning success I should give her a call and get her recipe.  This is adapted from her recipe, and it is yummy!!  And you need to pronounce that Ya-Um-EE!! 🙂

Kickin’ Corn Relish

8 cups of fresh corn (it took 10 ears for me today)

1/2 cup chopped onion (I am not a big onion person, so you could bump it up to a cup if you are)

2 cups of finely chopped sweet peppers of your choice (I used one red and one green bell to make it pretty)

1-2 finely chopped, seeded jalapeno peppers (depending upon your desired level of heat)

1 clove of garlic, minced

1 1/2 cups of sugar

1 tablespoon of salt

1 tablespoon of Turmeric

2 tablespoons of dry mustard

1 1/2 tablespoons of mustard seed

4 cups of distilled white vinegar

1 cup of water

Directions:  Remove the husks and silks from your corn.  Bring it to a boil and cook for 5 minutes.  Remove the corn from the cob and place it into a large pot with all of the rest of your ingredients.  Bring to a boil, then reduce the heat and simmer for 30 minutes.  Fill your jars while your relish is still hot.  Process for 15 minutes if you are canning.  This recipe makes 6 pints.  I went with quart jars though because that’s what we had handy.

As for what it looks like along the way…  I gathered up my ingredients while the corn was cooking and had to take a picture.  They were so pretty.  Unfortunately the kitchen was a little dark.  Is a kitchen re-model a tax deduction if I’m doing it to make it bright and beautiful for blog photos?

IMG_9791

I wish I could say the corn was from my garden, but unfortunately the corn didn’t do well this year.

IMG_9798

How pretty?!?!

IMG_9804

I was scared of this why???

IMG_9807

It’s fun making things as an adult that take you back to your childhood.  I guess one of these is going to my brother’s house.  Well….maybe….  🙂


sign off green


Sweet, Sweet Summertime!

aintrophoto

What is it about time that makes the summer go by so super quickly?  Time seems to go so fast now anyway, but summer flashes by at light speed.  It’s crazy!  It breaks my heart to think about the kiddos going back to school next week, but I will have more blogging time if there is an upside.

Gardening this time of year mostly means a little weeding and a lot of picking.  We have also started seeds for our fall garden under grow lights in the basement.  I want to do some canning soooo badly, but I haven’t been able to get a whole bunch of tomatoes ripe at the same time yet.  We have had several dinners with marinara sauce from scratch though.  There’s nothing quite like it.  🙂

photo(6)

The Super Awesome Husband looks at our haul every day, shakes his head and asks what happened to the good ‘ole red tomatoes.  Hee hee!  I have some of those too, but honest to goodness people, the colors and flavors of the others are incredible!  And purple peppers?  Heck yeah!  🙂

See??  I have red.  (Or it’s actually pink, but shhhh don’t tell him)! 😉 😉   Problem is, the stupid squirrels and birds like them too.  UGH!!!  I think what bothers me even more than the fact that they steal my tomatoes, is that they leave half of them to rot on the ground.  If you little jerks are going to rob my garden, at least eat every.single.delicious.nutritious.bite!!!!  Don’t waste half of it.  OR there are plenty of little ones, so leave my huge slicers ALONE!!!!  Sorry.  Deep breath.  I can’t stand waste or tomato thieves.  🙂

IMG_9844

Can’t have tomatoes without fresh basil.  Mmmmmmm.  I’m getting hungry now.  My favorite meal in the summer is sliced tomatoes with fresh mozzarella and basil, drizzled with balsamic vinegar.  Never gets old.

IMG_9811

Tomatoes and basil are meant to be together.  They are fabulous companion plants.  Many of my tomato plants in the garden (like this one), and all of my tomatoes in pots have basil growing around them.  They are supposed to make the tomatoes taste even better when grown together.  Plus, it makes it super easy to pick your maters and grab a handful of basil to put on top.  🙂

IMG_9843

See!  I told you I could grow carrots once I got them sprouted!!  It’s a jungle in there!!

IMG_9842

Beets!!!  So far (fingers crossed) the evil mole/vole duo hasn’t cleaned out the beet patch.  This guy has a hot date with my juicer in his future.  Yummy!

IMG_9831

I really hate the flavor of black licorice.  The Back to Eden film got me curious about fennel though.  Paul swore it was sweet and delicious and everyone seemed to love it.  Then I found a Bronze Fennel plant at our local farm stand and couldn’t resist how pretty it was.

IMG_9820

Now I can’t walk out to the garden without breaking off a little sprig and eating it.  The flavor is amazing!!  I could probably sit and eat the whole plant.  I don’t know if they all taste this way, or if it’s my rich, Back to Eden soil.  You HAVE to try some!

IMG_9819

Still only a couple of honeybees this summer.  I can’t wait to keep some bees one day.  Until then, we’ll have to rely on the little baby bumblebees.

IMG_9825

My daughter’s Scarlett Runner Beans.  We love the flowers!

IMG_9817

So I’ve been meaning to share with you some of my favorite gardening books.  I LOVE to read.  Though I don’t have a lot of time for it right now, these books keep me happy all winter while I can only dream about my little garden.

The Heirloom Life Gardener

The Gardener’s A to Z Guide to Growing Organic Food

The Weekend Homesteader: A Twelve-Month Guide to Self Sufficiency

Mini Farming:  Self-Sufficiency on 1/4 Acre

And because I am OBSESSED with getting chickens:

Homemade Living:  Keeping Chickens

I promise you will be hearing more about my chicken obsession.  😉  Lots more….

sign off green

DISCLOSURE:  This post may contain affiliate links, and I may receive compensation for sharing products and information on this site.  All thoughts and opinions are my own.  Thank you for supporting Walking Softly Upon the Earth!  See this page for full site Disclosure.

Walking on Eggshells

eggshells title image

Let’s chat a little about reducing waste and building soil.  These things are so very important!  We began going green here several years ago when we started recycling.  We began with mixed recyclables, and then a year or two after that I started keeping a box for paper recycling.  We were truly amazed at how much those two things cut down on our trash.  It was a wonderful feeling knowing I had cut our contribution to the landfill by about half.  It always made me sad seeing bag after bag and box after box of garbage after Christmas morning, so this year I made the decision to go through all of the wrapping and packaging and separate the paper as well as the recyclable plastic.  I was thrilled to find we were left with only half a bag of actual trash after this.  I’m happier when I’m doing my best for my children and our beautiful planet.

Two years ago we bought a compost bin.  (This one actually: Lifetime 60058 Compost Tumbler, Black, 80-Gallon)  Once again our trash can filled even more slowly, and you just can’t beat free compost for your garden.  It always seemed like such a complicated thing that I didn’t think we could keep up with, but it’s really not a big deal at all.  When it is time to empty our bin next month, we’ll go through some steps to making great compost.

If you have a garden I hope you are not throwing away your eggshells. Please tell me you’re not!  If you are, start saving them now!  When we started out we were throwing our eggshells into the compost.  I knew they were good for it and would add lots of awesome calcium to the soil eventually.  I then read more and more about ways to use eggshells more directly, so I began to rinse them out and place them back in the carton.  When we use the whole dozen, I bake them to dry them out and kill any bacteria.  You can either bake them on your lowest oven temperature for a couple of hours or pop them in the oven after baking something and let it sit in there as the oven cools.  Once they’ve cooled, grind those bad boys up.  You can just crush them into small pieces but it will take quite a while for them to break down and really be beneficial to your plants.  I bought a mortar and pestle and set the kids to work.

IMG_9698

It occupies them for a while, and they get to work on their arm muscles.  😉

IMG_9697

When they are very fine to powder texture we dump them into a storage container.

IMG_9696

I do a few different things with these now.  When I put my tomato plants in the ground at the beginning of the season I have a whole “cocktail” I add to the dug hole before adding the plant.  They get some Epsom Salt, an aspirin, rock dust, organic fertilizer (Fish emulsion or worm castings are wonderful) and a scoop of the ground eggshells.  If you have ever had a problem with blossom end rot, adding ground eggshells or bone meal at the time of planting, before your little tomato plants are even thinking about fruiting, is a wonderful preventative.  I also add them to the areas where I plant my squash and zucchinis since I’ve had trouble with blossom end rot with them as well.

Ground eggshells also help to ward off slugs.  I don’t know about your garden, but mine is a slug magnet in the spring, so I need all the help I can get protecting the plants.  I make a ring around the ground at the base of the little plants with the ground shells and, for the most part, the slugs won’t cross the shells because sharp edges cut their soft bodies.  It’s not perfect, but it is a HUGE help.

Since the pictures of eggshells aren’t overly exciting, I thought I’d add a few that I took this week of a couple of our dragonflies.  We have TONS of these guys flying around the yard lately and the kids and I just love them.

IMG_9648

Sometimes they sit and pose for me for as long as I would like, but this week they were a little too busy and kept flying off after a few seconds.

IMG_9634

I love the blue ones.

IMG_9655

My daughter looked at this and asked if the patterns on dragonfly wings are all different, like fingerprints.  I LOVE when my kids come up with really awesome questions.  🙂  Of course, it also ruins the mom knows everything card.  😀

IMG_9658

I am amazed by their eyes.  It’s probably the photographer in me obsessing over eyes, but W.O.W.!!!

IMG_9656

Summer is going way too fast!  I hope you are enjoying every second of yours!!!

DISCLOSURE:  This post may contain affiliate links, and I may receive compensation for sharing products and information on this site.  These links help support this site, and do not cost you extra to use.  All thoughts and opinions are my own.  See this page for full site Disclosure.  Thank you for supporting Walking Softly Upon the Earth!!  🙂

My Sky Blanket

skyblanket main

In 2012 I stumbled across a super cool knitting project, and instantly fell in love with the concept.  Simply put, you knit a row a day of a scarf using the colors of the sky that day.  Yarn is held double stranded, so you pick the two colors most prevalent (like light blue and white for a blue, cloudy sky or two strands of dark blue for a clear, dark blue sky) and knit back and forth, carrying the extra yarn up one side.  At the end of the year, you have a beautiful scarf that illustrates what the sky looked like for the whole year.  You can see the whole project, with instructions here:  Sky Scarf

I really, really wanted to make a sky scarf, but I never really found a pattern that I wanted to knit, so it eventually slipped from my mind.  At the end of last year I was browsing some knitting blogs and found where someone had a stroke of genius and used the Sky Scarf idea, but instead made it as a blanket.  I loved this idea even more, because who doesn’t love a gorgeous granny square blanket?!?!  I ran to the store and found my yarn, bought a little notebook to keep track of the sky colors every day.  (I am realistic people!  I knew I wouldn’t knit a square and sew it to the blanket every single day for a year).  We won’t talk about how far behind I am, but at least we are keeping up with the journal.

You can find the complete instructions here if you would like to make your own:  How to Knit a Sky Blanket

I am just doing the knitted garter stitch squares like she has in her instructions, but if you check out the Sky Blanket Group on Ravelry, there are people crocheting it and using other patterns for their squares, which look beautiful as well.  (For you knitters, I’m left-handed.  My needles aren’t placed there wrong.  🙂 )

IMG_9489

My handy dandy notebook.  😉  The kids are helping me keep up with this.  They love coloring in the little squares every day.  During the school year we kept it in the car and they took turns filling them in for me on the way to school.  Summer has proved a little more challenging, but we are doing a pretty good job remembering.  My Super Awesome Husband keeps insisting that no one will point out a wrong square if I forget and have to make one up.  *eye roll*  What does he know….

IMG_9503

The project chart came from a generous knitter on Ravelry.  I am using the notebook to record the daily sky, and the chart to keep track of the squares I have sewn to the blanket.  Do me a favor and don’t look too closely at my progress, would ya?  I’ve gotten another whole row sewn to the blanket since I took these photos.  I’m catching up!!  🙂

IMG_9495

My little squares.  They really take no time at all to knit.  I am just TERRIBLE at sewing, so that is where I am falling behind.  I probably should have figured out how to do it without having to sew.  Hindsight.  Sigh.

IMG_9492

I love the colors!  It’s going to be sooooo pretty!!

IMG_9483

To make things easier on myself, since some days the sky changes and goes through all of the colors, I have been trying to just do our first glance at the morning sky.  This can still cause disagreements on the way to school when the kids see more than two colors.  I know you’ll never believe that three kids can argue over something so simple.  (Hear my sarcasm)?  🙂  I just give myself the deciding vote and stick to the two most dominant colors, or what I think it will look like for most of the day.  My five year old still doesn’t get why I just can’t make a square with all of the colors.  🙂

IMG_9487

I’ll try to post updates from time to time so you can see how it’s going.  Just don’t expect a finished project on New Year’s Eve!  🙂

How I got my husband to look at me like I’m nuts…today

walkingsoftlyupontheearth

My Super Awesome Husband looks at me like I’m nuts several times a week.  Okay, okay.  If I’m being completely honest, it’s probably more like several times a day with a few good eye rolls behind my back thrown in for good measure.  What raises him to Super Awesomeness is that he is totally supportive (despite the eye rolls) and such a good sport through my crazy ideas, even if most of them often lead to crazy amounts of physical labor on his part.

I’ll admit, there are times I think of something to mention or do, just to make him shake his head and roll his eyes.  It’s fun.  Ha Ha!  Today I made him look at me like I’m nuts by making felted wool dryer balls.  “You’re making what?” asks Super Awesome Husband.  “Dryer balls”  I tell him.  “And what are dryer balls?”  he asks with that look on his face that I love.  😀  Ah, life is good!

So today’s project is part of my mission this year to remove chemical filled products from my home.  Luckily for the Super Awesome Husband it requires 0 labor on his part.  🙂  Dryer sheets are full of chemicals and cost money.  Dryer balls are super simple to make, help your clothes dry faster, reduce static and make your clothes less wrinkly and smell nice without all of the chemicals.  All you need to make them is some 100% wool yarn that states hand wash and lay flat to dry on the label.  If you use machine washable yarn it won’t felt, and you need it to felt.  You also need one leg of pantyhose and a blunt needle to sew in your end.

Take your yarn and wrap it into a ball the size of a tennis ball.  Take your blunt ended needle and sew in the end really, really well.  If it’s not done well enough, your ball will unwind and you’ll end up with a felted mess.  If you are really creative or good at forgetting what you can and can not do well,  you can stitch a pretty design on your ball.  I mentioned this to my daughter and she, of course, thought it would be a great idea to have a flower on the one she made.  Let’s just say, every time I sew I remember why I don’t sew.  Next time something might involve sewing, my mom will be called.  Don’t go making fun of my flower!  I mean it!

IMG_9471

Are you done laughing yet?  I totally should have let my daughter do it herself.  🙂

Load all of your balls in to one leg of a pair of pantyhose that you cut off, and tie a knot in between each one.  Try to keep your male children away from them.  It’s an irresistible, fierce, ninja weapon at this point.

IMG_9473

Throw your balls into the washer and wash on hot with as much agitation as your washer offers.  Dry them on high as well.  If you don’t use super dark colors for your dryer balls and have super light colored towels or sheets you can save water and electricity by washing and drying them with your sheets and/or towels.  You will need to do this 2-3 times to get the balls nicely felted.

IMG_9510

Now to use them you just toss 4-6 balls (depending upon how big of a load you washed) into your dryer with your wet laundry and dry.  The wool will absorb some of the water and help you laundry dry faster.  It will also keep the humidity high while releasing it, which will help with wrinkles.  Dryer balls keep the static down and, it you add a drop of your favorite essential oil to each ball, will freshen your laundry and make it smell fantastic!

IMG_9518

I have fallen in love with Young Living Essential Oils, so if you’ve been wanting to try some as well, shoot me an email and I’d be happy to send you information and a sample!  You can use the contact page of the blog or email directly to [email protected]

I want to send a virtual high five to anyone who has made it through this post without giggling at all of the sentences with “your balls” in them.  You are a much better, more mature person than I, and I commend you!!  To those who have been giggling like a middle schooler, you get a high five too, because, well, we all have our issues.  😉

DISCLOSURE:  This post may contain affiliate links, and I may receive compensation for sharing products and information on this site.  All thoughts and opinions are my own.  See this page for full site Disclosure. 


Chasing Away the Crickets

Sorry for the crickets this past week. Summer vacation started for the kidlets, so we’ve been busy living it up with trips to the beach and park and hitting up their favorite playgrounds. And yes, there has been ice cream involved. We take summer vacation very seriously in this house. 🙂

The kids totally freaked out this week when these guys made their return:

IMG_9366

I had no clue until very recently that our friends on the west coast do not have fireflies.  It’s one of those things I take for granted seeing every summer and I just assumed that everyone had them.  I can’t imagine summer without the kids running around catching these magical little guys.

I have a bunch of really cool posts in the works, but instead of making you wait while I finished them up, I thought we’d see how things were going in the garden.

Remember the sad state of affairs my marigold window box was in? Well, I spread out the few marigolds that sprouted and added some nasturtium seeds to fill it in and it’s not looking half bad now. Way less sad.

IMG_9295

The kids and I were so excited to find a few Sweet Pea Currant tomatoes and Sun Gold Cherry tomatoes ripe this week. Sooooo tasty!! It just doesn’t get better than homegrown tomatoes!  If I HAD to choose just one thing to grow in my garden, it would probably be tomatoes.  Now ask me what kind of tomato and I would have a problem.  You need one for every color of the rainbow, right?!?!  🙂

IMG_9298

Purple Beauty Pepper. It’s teeny tiny, but we don’t judge. 🙂  I can’t figure out who is chomping on her leaves.  I suspect a Hornworm, but haven’t found one yet and they are usually very easy to spot.  It’s a mystery.

IMG_9301

Rosita has finally gotten over her transplant shock and her unfortunate run in with a slug. She really liked the compost tea I gave her, but what lady doesn’t like her tea? 🙂

IMG_9374

I am loving the ground cherries. They form little lanterns like tomatillos.  If you are new I’ll tell you now, I love the out of ordinary when it comes to my garden. I pick a lot of my seeds based on unusual colors and I love stumbling across something I’ve never seen in the grocery store before.

IMG_9367

My Sweet Pea’s lavender. She loves it like I do.

IMG_9358

Garlic scapes I think. I planted all soft neck garlic though, so I’m not completely sure. Hmmmm…..

IMG_9361

I may have a new garden obsession. Borage. It is so, so, so pretty!! I killed it all last year before I saw any blooms. (It’s a learning experience people)! 🙂 The plants in front of my strawberries are all way ahead of the ones by the tomatoes and are now blooming. Take a look and I bet you’ll be planting some seeds yourself.

IMG_9346 IMG_9352 IMG_9344 I’m so in love with this shot.  The fuzzy leaves and stems make it look like a watercolor painting.  I may have to print this one for the wall. IMG_9340 cropped IMG_9338  IMG_9316 IMG_9311  IMG_9321  IMG_9347 IMG_9355

See, I told you I was obsessed!!!  I get so excited when something I’ve planted from seed grows and flourishes.  If you have always purchased plants to plant in your garden, you HAVE to try growing at least one thing from seed this year.  It’s nothing short of a miracle to put this little, tiny seed in the ground, and a few weeks later get this. ^^^

This week will be packed with fun posts.  I promise not to stay away this long again.  Happy Summer everyone!!

Listen to the Whispers

I can’t even begin to stress enough that, in order to have a healthy, productive garden, you must listen!  You must listen to others with more experience, and you must listen to your plants.  They whisper, they don’t yell, so you have to listen very carefully.  (Well, except for maybe when they are being eaten alive by slugs, because I swear they scream then.  Or maybe I’m just hearing myself.  Man I hate those slimy pigs!  Ugh).

It is so very important to hear what they are telling you.  If they are yellow and sad looking they may need a little feeding or, when you look closer, you might find they are sick.  They may also be telling you that you have chosen the wrong spot for them.  Just because you think they would look pretty in a certain spot doesn’t mean that is where they will flourish.  Take, for example, my spinach.  I thought it would grow beautifully in my vertical gutter garden.  It’s doing okay.

IMG_8980

But on the end next to the deck, where it is fairly shaded, look how much better this plant is growing.  If I hadn’t slowed down and listened, I might have missed them telling me it’s too hot and sunny in this spot.

IMG_8981

As for my carrot experiment using vermiculite?  I think it’s safe to say it was a success.  Look at all the carrot babies!!

IMG_8913

Aren’t they cute??

IMG_8915

Guess who is planting with vermiculite next year?  Yep.  This girl!  So glad I listened.

IMG_8929

Want to see what else is happening in the garden right now?  We had a carrot top survive the winter in the compost and sprout months ago with the tomatoes and lettuce head.  Carrots are one of those plants that only go to seed their second year.  We’ve left it in this spot hoping that we might get some seeds to collect.  Look at what’s happening!  It’s getting ready to bloom!!

IMG_8938

Someone else decided to grow from the compost too.  I have no clue what this is.  Cucumber?  Squash?  Pumpkin?  No idea.  It will be fun to watch and find out though.

IMG_8936

I absolutely adore sweet peas.  I tried growing them for years, while my thumb was still pretty black, and never kept them alive long enough to bloom.  I think now that my thumb is a pale shade of green I might give them a try this fall or next year.  There is just something special about the swirly twirly little arms and beautiful, sweet flowers.  This is my second season with snap peas, and they are so pretty (and yummy) too!  Not quite the same, but the tasty treats they supply more than makes up for the lack of color and fragrance.

IMG_9010

IMG_8998

IMG_8988

The kids flipped over these last year.  I wish we had gotten tons more planted.  Maybe next year…

IMG_8896

This folks, is our cute little garden toad.  The kids have decided to call him “Croaker.”  The pup-sicle tried to eat him last night.  Well, maybe he was just chasing with the silly little hopping creature that was in his yard, but I swooped in to the rescue anyway.  No toad eating allowed here.

IMG_8947

Our yard is full of dragonflies right now too.  I love the green ones the most, I think, but this one is awfully pretty too.  I had one of the green ones sit and pose for me a couple of years ago, while I took pictures til my heart’s content.  I’ll have to dig those out for you sometime.

IMG_8949

I’ve been working so hard to get everything in the ground that I haven’t checked on the other plants in a while.  I was pretty darn excited to see this:

IMG_8956

and this:

IMG_8953

Are you kidding me?!?!  Baby grapes???  🙂

IMG_8952

Almost missed the blossoms on the ground cherries.  This is my first time trying these, and I am so excited to taste them and see what they are all about.  Sometimes you read the description on a packet of seeds and just have to have them.  Or is that just me??  🙂

IMG_8932

Grape Jellybean tomatoes.  I’ll take them over candy jellybeans any day!  They are my Little Dude’s absolute favorite.

IMG_8909

Chamomile flowers.  These all reseeded on their own.  I really need to learn how to make my own chamomile tea.  I grew them last year just because they were pretty, but I am a big tea drinker, so I shouldn’t just let them go to the compost bin when they are done.

IMG_8910

The radishes need pulling.  They are so fun to grow.  I just need to find something yummy to do with them now.  The only way I have ever eaten radishes is in salads.  There has to be something else to do with them, right?

IMG_8923

They are just busting out!

IMG_8928

Sungold tomatoes on the way!

IMG_8957

Baby Round Zucchini were one of my favorites last year.

IMG_8960

I am so looking forward to Saturday.  The kids’ last day of school is Friday, and this will be our first soccer-free weekend in months.  There will be lots of playing in the garden and just hanging out with the family.  I hope your weekend is wonderful and all of you Dads have a great Father’s Day!

What’s up Doc?

Well, I can tell you what’s not up, and it wouldn’t make Bugs happy.  The carrots dang it.  I’ve gotten pretty good at growing a few different things, but carrots are not one of them.  Actually, I take that back, once they’ve sprouted I do a pretty good job.  It’s the germination that’s tricky.  I think it took me three tries last year to get some sprouts, and I’ve been failing big time this year.  See?  Nothin’.

IMG_8143

Nada.

IMG_8144

Zippy.

IMG_8146

So with gardening, nothing beats experience.  I have read a TON of gardening books, and while I have learned a lot from them and enjoyed them immensely, I’ve learned more by doing and also by listening to veteran gardeners.  I was recently told by a gardener to try covering my seeds with vermiculite instead of soil.  Carrot seeds need to stay consistently moist to germinate.  If they dry out you get a lotta nothin’.  So guess what I went out and bought?

IMG_8151

Since it has rained the past two days, and the ground is really damp and it’s nice and cool for the next few days, I headed down to the garden for some quick carrot planting.

IMG_8147

Those seeds are so dang tiny!  I just sprinkled them in a line-ish and didn’t get too crazy trying to space or keep them perfectly straight.  Finally,  the vermiculite got spread over top.

IMG_8157

My little carrot corner.  Hopefully….

IMG_8158

I’ll let you know how this little experiment goes.  It would be awesome if I have found the trick to growing carrots at last!  Were you wondering about the broken pot?  It’s our garden toad house.  The marigolds grow up around it and keep it cool and hidden.  At least they do when the slugs don’t eat them all gone.  I have a couple left who have pulled through and more in the greenhouse that are about ready to go out and face those slimy pigs.  May the force be with them!

IMG_8159

Did you get to spend a lot of time in the garden over the holiday weekend?  My little Sweet Pea joined me out there and we spent hours and hours trying to get our garden caught up.  With the never-ending winter and then craziness that is our lives in the spring, we were so far behind.  We planted all but 6 of our tomatoes, all the peppers and some cucumbers.  It’s coming along nicely now.

IMG_8166

The nasturtiums are popping up.  I love them so much that I’ve planted a bunch more than last year.

IMG_8165

I can’t wait to see them blooming with the Borage in front of the tomato plants.

IMG_8162

The Kale is so happy it rained and cooled down.

IMG_8164

I thought something was making a meal of my green beans, but come to find out, we have leaf cutter bees.  The plants will not be eaten and will survive and we’ll have some much needed pollinators.  Win.  Win.

IMG_8170

I really, really, really hate spiders, but this garden spider was pretty cool looking and I thought my little Monster man would like to see it later.  As long as she eats some bad bugs and stays (far, far) out of my way, we’ll get along just fine.

IMG_8183

Grow babies GROW!  Can’t wait!!!!  🙂

IMG_8172


Knitting, it’s not a hobby | A Perfect Knitted Dishcloth

knitted dishcloth

I have a little cartoon on my Pinterest page that says “It’s not a hobby it’s a post apocalyptic life skill.”  My husband and I L.O.V.E “The Walking Dead” (which I still can’t believe, even after watching all this time since I am NOT really a zombie kinda girl), so that gave me a chuckle.  If this justifies the amount of time I spend knitting, then that’s my story and I’m sticking to it!  🙂  I wish I had more free time to knit, but as a mom of three, my knitting time is snatched in bits and pieces at soccer practices, waiting for doctor’s appointments and sometimes for an hour or so watching tv at night when the kids have gone to bed.  I always tell people it’s so relaxing and therapeutic for me.  There’s something about the rhythm that calms and quiets my mind.  LOOOOOOOOVE it!

I’ve been knitting for about 6 or so years now.  My skills have improved greatly over the years, so that now I’m not too shabby and actually give what I make as gifts.  See!!  Not just a hobby!!!!  🙂  I get asked all the time how I started knitting.  I think most people expect a heartwarming story about how my grandmother taught me at her knee, or something like that.  Truth? Knitting for Dummies.  For real.  I had tried crochet when my first two were born so that I could make them little baby blankets, and while I did produce a blanket for them each, I was NOT good and really hated it.  Sooooo, while expecting #3 I walked past a copy of Knitting for Dummies at a store and grabbed it thinking maybe this knitting thing would save me from the torture of crocheting another blanket.  I tried it and LOVED it.  If you’ve always wanted to try and didn’t know where to start, that’s my secret!  🙂

In paperback:

On Kindle:

If you’ve always wanted to learn, I highly recommend that book.  You can also find tons of instructional videos on YouTube, or if you need more hands on instruction, you can’t beat a class at your local yarn shop.  I am going to share my current projects here from time to time.  I hope that those of you who are knitters will enjoy the posts and perhaps find a great new pattern to try.  If you are not yet a knitter, then I hope to entice some of you to try with pictures of pretty yarn and fun looking projects.

My other knitting secret weapon?  Ravelry.  Knitting any pattern is a commitment.  You have to buy your yarn and invest your time into it.  I hate wasting money and I hate wasting my time even more.  Ravelry is super awesome because so many patterns are offered for free or at low cost.  It’s always great for me to be able to buy a single pattern instead of buying a whole book just for one or two.  Plus, you get to look at tons of pictures other knitters have posted of their results and read their notes, which is always helpful when I am trying to choose a good pattern.  I am not affiliated with them in any way, other than being a member.  If you are cool enough to read this blog, I want to make sure that you know about some of the best things I’ve found along the way if you don’t already.

Grandma’s Favorite Dishcloth

Free pattern.  Skill level is easy peasy lemon squeezy (as my little dude loves to say).  This is a quick knit and would be great as one of your first projects if you are just starting or one of those easy take-along projects for more seasoned knitters.  Big bonus is that they are really sturdy and work really well!  I’ve been using one for a couple of months now and it’s still working great and hanging together.  Knit a little stack and they make a great gift too!

Skills needed:

Cast on

Bind off

Garter stitch

yarn over  (Yarn over instructions can be found at the bottom of this increase page)

IMG_8408

My daughter loves rainbows.  I think she came by it naturally.  🙂

IMG_8410

This was my first experience with knitting dishcloths, but it won’t be my last.

IMG_8419

Next time we talk knitting I have a very special, year long project to share with you.  I was so excited to start it this year and am far behind and trying to catch up before I share.

sign off green


DISCLOSURE:  This post may contain affiliate links, and I may receive compensation for sharing products and information on this site.  All thoughts and opinions are my own.  See this page for full site Disclosure.