Tag Archive: chemical free

Kicking the Chemicals~Recipes With Castile Soap

Recipes With Castille Soap

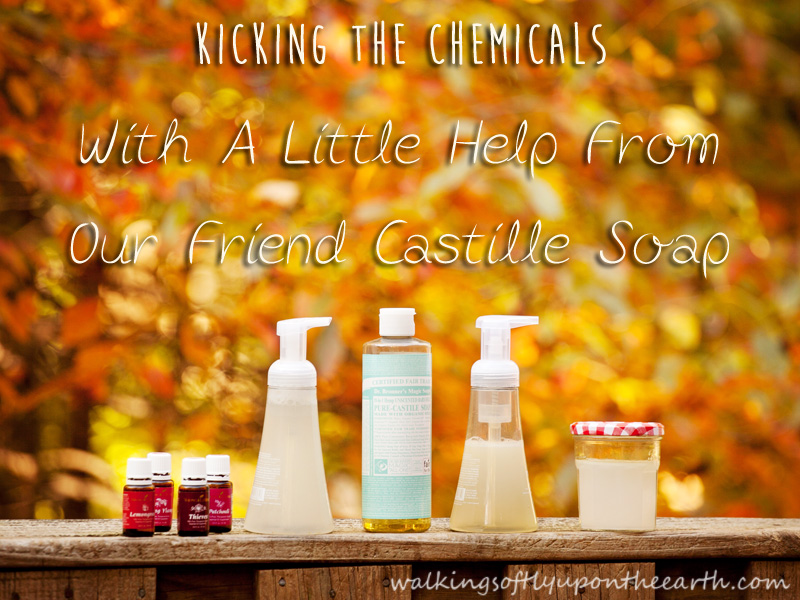
Today we continue our Kicking the Chemicals series, as I try to rid my home (and yours) of as many chemicals as possible.  I’ve recently discovered the wonder that is castile soap.  So did the Super Awesome Husband when he saw the bottle sitting on the counter.  I saw the eyebrows raise as he lifted the bottle to see what it was and got an eyeful of the label.  Whoops!  I knew some explaining was called for, because, really, have you SEEN the Dr. Bronner’s Castile Soap label?  Eek!  But all I could say (with an apologetic look on my face) was a weak “It’s a really safe soap to make other soaps with.”  How lame?  So I threw out “It’s all the rage with the hippie crowd.”  (For those who have just joined us my Super Awesome Husband is really freaking awesome, but the woman he married was not this crazy, crunchy, health conscious, gardening geek that I have become the past five years.  He is patient and supportive, but I am a constant recipient of the eyebrow raise and eye roll before he humors me).  His response?  “Should we really be taking soap advice from hippies?”  😀  Well played Super Awesome Husband.  Well played.  But the castile soap stays.  Score!

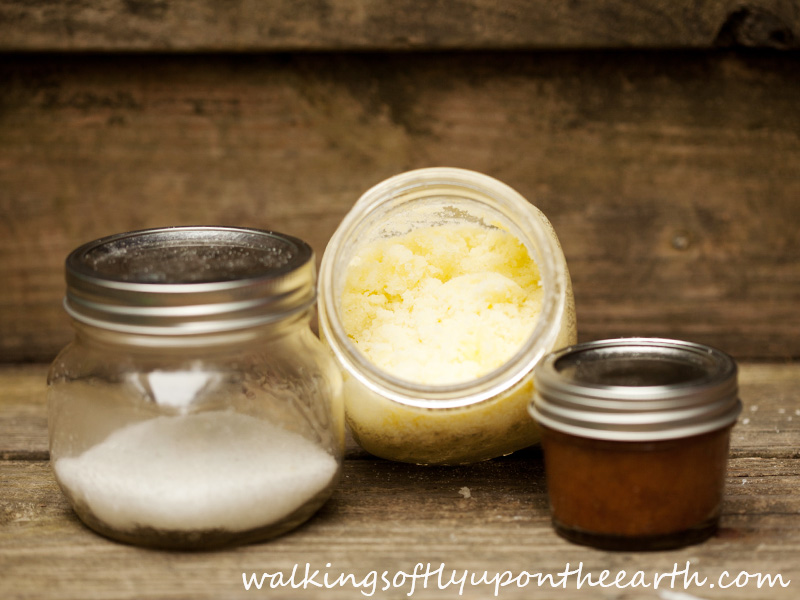
I am going to share three crazy cool recipes I am now using in my home.  Antibacterial soap was a big offender I wanted to ditch, but with the months approaching that my children are always the sickest, I still wanted a really good soap to clean those grubby little hands.  Here’s what I found:
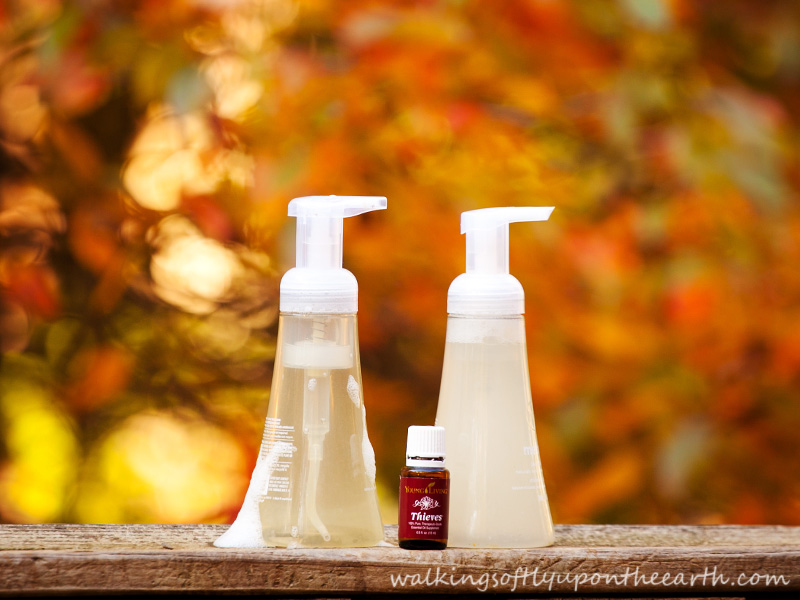
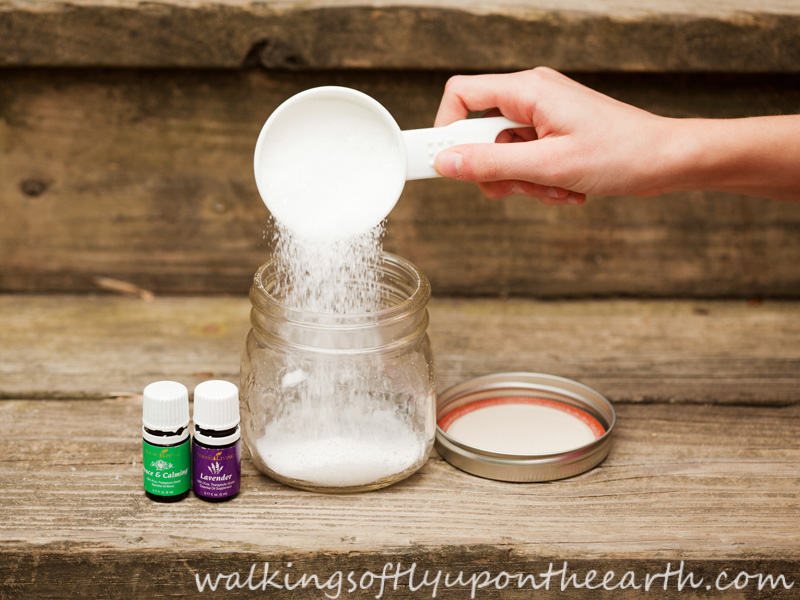
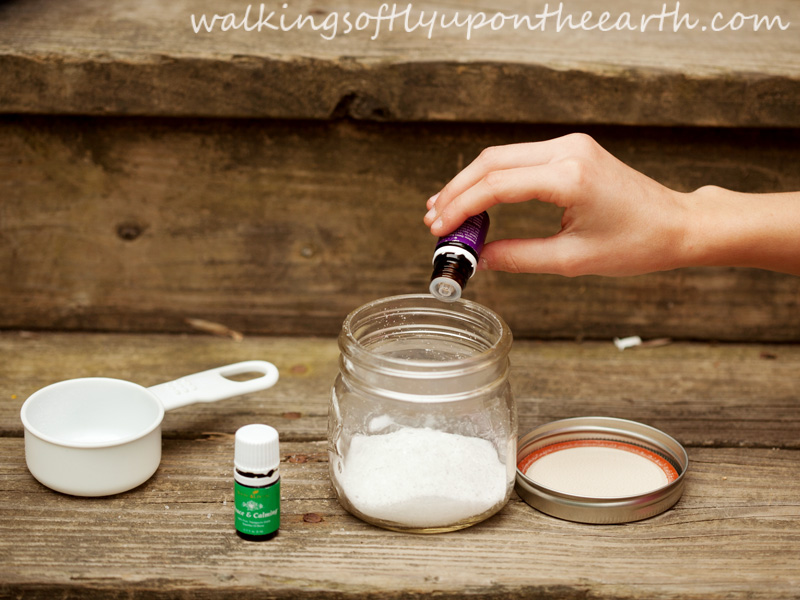
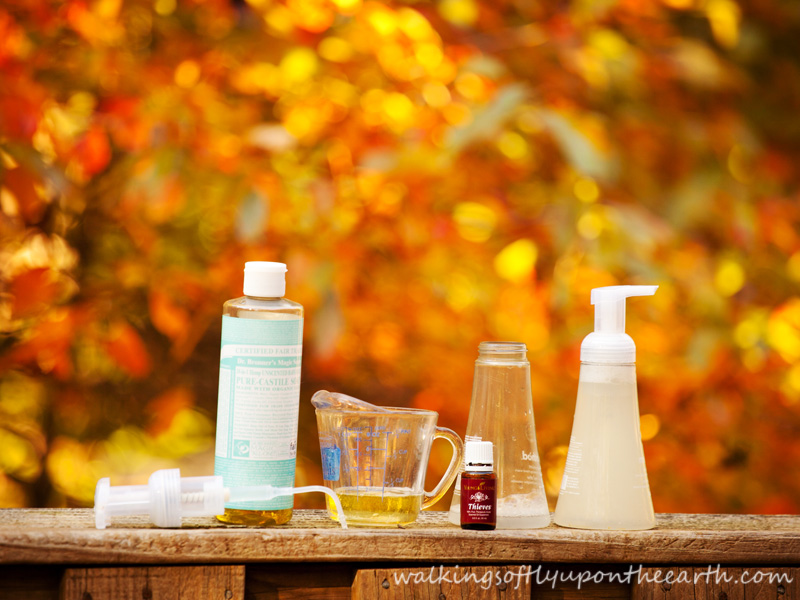
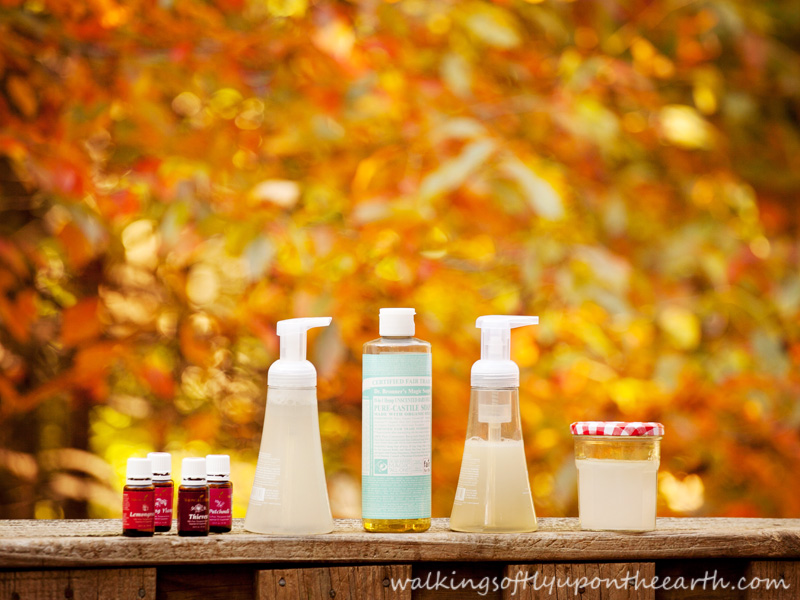
IMG_0089

Foaming Hand Soap

1/4 cup of castile soap (I love Dr. Bronner’s Unscented Baby Mild)

5 drops essential oil for scent and extra germ killing power (I LOVE using Young Living’s Thieves for this)

filtered water

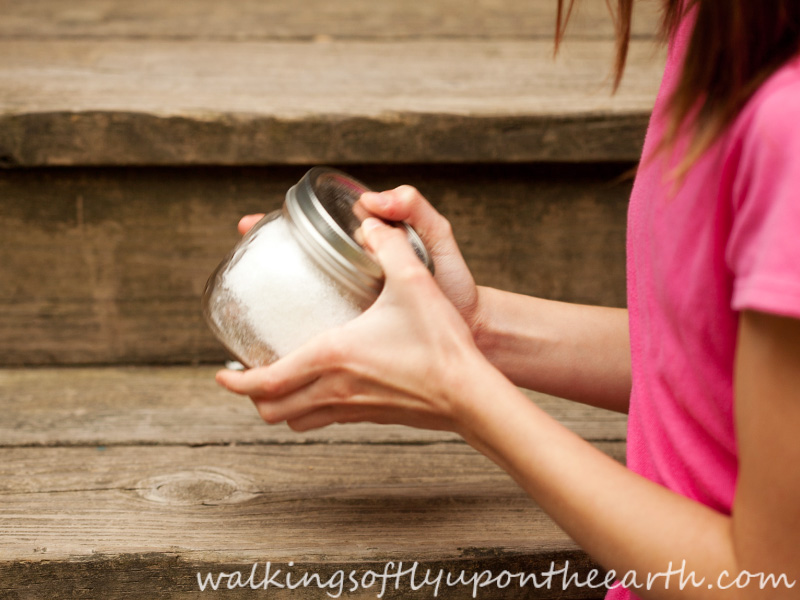
Directions:  All you have to do is put your castile soap in a clean, empty foaming hand soap dispenser (I reused some that I had), add your essential oils and fill the rest of the bottle with filtered water.  Mix gently and you’re ready to go.

IMG_0083

I only use soap on my face once in a while because my skin is so dry and I’ve had a hard time finding something that is gentle enough for even using a couple of times a week.  This recipe is wonderful!

IMG_0091

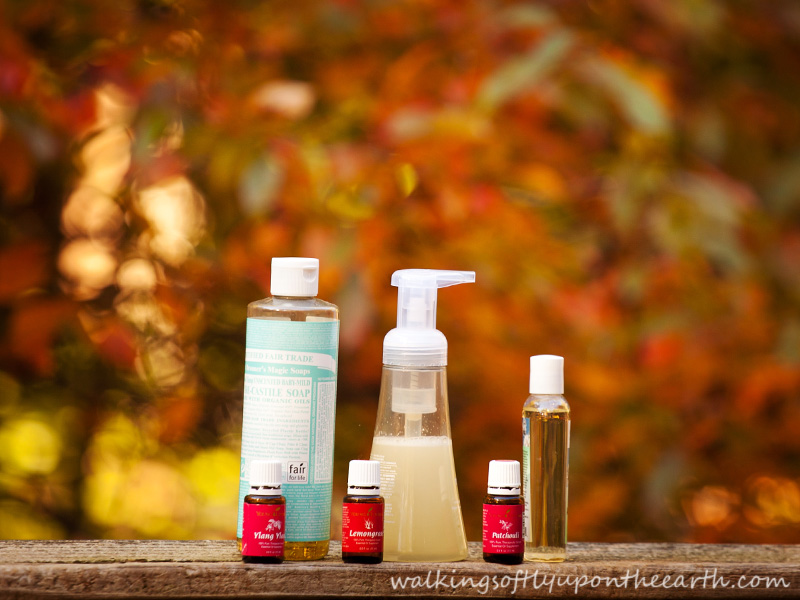
Foaming Facial Cleanser

1/3 cup castile soap

1/2 tsp. sweet almond oil or olive oil

10 drops of Ylang Ylang Essential Oil

6 drops of Patchouli Essential Oil

4 drops of Lemongrass Essential Oil

2/3 cup filtered water

Put all of the ingredients in a foaming soap dispenser and mix gently.  This leaves my face feeling wonderful, and doesn’t cause any additional drying.

This last recipe was a great find for me.  I don’t wear a lot of makeup, but I do like my mascara.  My eyes are super sensitive though, and most makeup remover was either too greasy or burned my eyes.  I found this recipe, and with a slight alteration, it was perfect!

Eye Makeup Remover

1 cup of filtered water

1/4 tsp. of unscented castile soap

1 1/2 tsp. of olive oil

Put all ingredients in a little jar and swirl to mix.  I swirl it a little before I dip my cotton ball in each time just to disperse the oil.  When I get down to the end of the jar I usually need to add just a little bit more oil so that it still works well.

IMG_0080

And there ya have it!  Three more chemical filled products kicked to the curb.  🙂  Proof you CAN take soap advice from a hippie!  😉

sign off green

If you would like more information about Essential Oils I love and use, you can click here, or shoot me an email from the contact page above or directly to [email protected] and I would be happy to answer any questions you might have or send you a free sample.

DISCLOSURE:  This post may contain affiliate links, and I may receive compensation for sharing products and information on this site.  All thoughts and opinions are my own.  Thank you for supporting Walking Softly Upon the Earth!  See this page for full site Disclosure.

Kicking the Chemicals~Bath & Shower Products

top image

My post about my balls, I mean my DRYER balls 😉 has been so popular that I think I am going to do a little series we are going to call Kicking the Chemicals.  As you’ve heard I am doing my best to rid my home of as many harmful chemicals as I can. We’re talkin’ house cleaners, people cleaners, moisturizers, air fresheners, well, you get the picture. So let’s get this party started!!

As a mom of three, my days are busy and insanely nuts a little crazy sometimes.  My *me* time is my bath in the evening.  Kids go to bed.  Mom takes a bath.  Sometimes I take a good book in and read while I soak, and others just close my eyes and totally relax.  A nice, hot bath is awesome, but a yummy smelling one is even better, so I’ve been a bit of a bubble bath, bath bomb, bath salt, bath oil, etc., collector.  Then I read the ingredient list on one.  Well, if that wasn’t a bummer I don’t know what is.

First, I needed a good exfoliating scrub for the shower.

Sugar Scrub

1 Cup Sugar

3-4 Tablespoons of oil (olive oil or grapeseed oil are my favorites for this)

5 drops of essential oil

Or

1 cup brown sugar

1/2 cup liquid coconut oil

5-8 drops of essential oil

My favorite scent for this is 4 drops of Lavender Essential Oil + 8 drops of Lemongrass Essential Oil, but use what you like.  The good thing about this is you can also make the scent as soft or strong as you like.  Big bonus for someone like me who is super sensitive to fragrance.

IMG_9859

Gather your ingredients and add your oil and essential oils.

IMG_9869

Mix well and you are ready to go!  A little goes a long way, so take it easy the first time you use it so you don’t waste a bunch.  Also, if you don’t have a non-slip mat in your bath, be careful while you are showering and spray the floor down when you are finished so that the next person doesn’t end up with crazy slippery floor.  Because chances are fairly decent it will be you, and you don’t want to recreate the Bambi on ice scene the next time you step in the shower.  Not speaking from personal experience of course….  (insert guilty whistle here)

IMG_9870

Next came scenting my beloved baths.  Epsom salts are fantastic for baths!  Be sure to drink lots of water before and after!  FYI The bath salts don’t make my tub slippery like the sugar scrub does.  No Bambi.  🙂

Bath Salts

1/2 cup Epsom Salt

4-6 drops of essential oil

Directions:  This couldn’t be simpler.  Dump your epsom salt into a container.  (The above amounts make enough for one large tub or two regular sized tubs so make as much or as little as you like).

IMG_9846

Add your favorite essential oils for scent and to help anything that ails you.  My favorite combination for a super relaxing bath experience is Lavender and Young Living’s Peace & Calming.  Sigh.  Heaven.

IMG_9848

Put the lid on and shake that bad boy up!

IMG_9853

I wish you could smell the yummy-ness!

IMG_9873

These make super fantastic gifts as well.  I just got an email this week from my old favorite online body and bath product site saying they missed me.  Cringe.  I told you I had a problem.  🙂  We actually had a package from them delivered to our house that should have ended up down the street.  My Super Awesome Husband shook his head and told me that means I ordered too much from that company if the FedEx driver just assumed it was mine.  🙂  And now, my friends, I am reformed.

If you would like more information about Essential Oils you can click here, or shoot me an email from the contact page above or directly to [email protected] and I would be happy to answer any questions you might have or send you a free sample.

Have a great weekend!  🙂

sign off green

Sweet, Sweet Summertime!

aintrophoto

What is it about time that makes the summer go by so super quickly?  Time seems to go so fast now anyway, but summer flashes by at light speed.  It’s crazy!  It breaks my heart to think about the kiddos going back to school next week, but I will have more blogging time if there is an upside.

Gardening this time of year mostly means a little weeding and a lot of picking.  We have also started seeds for our fall garden under grow lights in the basement.  I want to do some canning soooo badly, but I haven’t been able to get a whole bunch of tomatoes ripe at the same time yet.  We have had several dinners with marinara sauce from scratch though.  There’s nothing quite like it.  🙂

photo(6)

The Super Awesome Husband looks at our haul every day, shakes his head and asks what happened to the good ‘ole red tomatoes.  Hee hee!  I have some of those too, but honest to goodness people, the colors and flavors of the others are incredible!  And purple peppers?  Heck yeah!  🙂

See??  I have red.  (Or it’s actually pink, but shhhh don’t tell him)! 😉 😉   Problem is, the stupid squirrels and birds like them too.  UGH!!!  I think what bothers me even more than the fact that they steal my tomatoes, is that they leave half of them to rot on the ground.  If you little jerks are going to rob my garden, at least eat every.single.delicious.nutritious.bite!!!!  Don’t waste half of it.  OR there are plenty of little ones, so leave my huge slicers ALONE!!!!  Sorry.  Deep breath.  I can’t stand waste or tomato thieves.  🙂

IMG_9844

Can’t have tomatoes without fresh basil.  Mmmmmmm.  I’m getting hungry now.  My favorite meal in the summer is sliced tomatoes with fresh mozzarella and basil, drizzled with balsamic vinegar.  Never gets old.

IMG_9811

Tomatoes and basil are meant to be together.  They are fabulous companion plants.  Many of my tomato plants in the garden (like this one), and all of my tomatoes in pots have basil growing around them.  They are supposed to make the tomatoes taste even better when grown together.  Plus, it makes it super easy to pick your maters and grab a handful of basil to put on top.  🙂

IMG_9843

See!  I told you I could grow carrots once I got them sprouted!!  It’s a jungle in there!!

IMG_9842

Beets!!!  So far (fingers crossed) the evil mole/vole duo hasn’t cleaned out the beet patch.  This guy has a hot date with my juicer in his future.  Yummy!

IMG_9831

I really hate the flavor of black licorice.  The Back to Eden film got me curious about fennel though.  Paul swore it was sweet and delicious and everyone seemed to love it.  Then I found a Bronze Fennel plant at our local farm stand and couldn’t resist how pretty it was.

IMG_9820

Now I can’t walk out to the garden without breaking off a little sprig and eating it.  The flavor is amazing!!  I could probably sit and eat the whole plant.  I don’t know if they all taste this way, or if it’s my rich, Back to Eden soil.  You HAVE to try some!

IMG_9819

Still only a couple of honeybees this summer.  I can’t wait to keep some bees one day.  Until then, we’ll have to rely on the little baby bumblebees.

IMG_9825

My daughter’s Scarlett Runner Beans.  We love the flowers!

IMG_9817

So I’ve been meaning to share with you some of my favorite gardening books.  I LOVE to read.  Though I don’t have a lot of time for it right now, these books keep me happy all winter while I can only dream about my little garden.

The Heirloom Life Gardener

The Gardener’s A to Z Guide to Growing Organic Food

The Weekend Homesteader: A Twelve-Month Guide to Self Sufficiency

Mini Farming:  Self-Sufficiency on 1/4 Acre

And because I am OBSESSED with getting chickens:

Homemade Living:  Keeping Chickens

I promise you will be hearing more about my chicken obsession.  😉  Lots more….

sign off green

DISCLOSURE:  This post may contain affiliate links, and I may receive compensation for sharing products and information on this site.  All thoughts and opinions are my own.  Thank you for supporting Walking Softly Upon the Earth!  See this page for full site Disclosure.

Walking on Eggshells

eggshells title image

Let’s chat a little about reducing waste and building soil.  These things are so very important!  We began going green here several years ago when we started recycling.  We began with mixed recyclables, and then a year or two after that I started keeping a box for paper recycling.  We were truly amazed at how much those two things cut down on our trash.  It was a wonderful feeling knowing I had cut our contribution to the landfill by about half.  It always made me sad seeing bag after bag and box after box of garbage after Christmas morning, so this year I made the decision to go through all of the wrapping and packaging and separate the paper as well as the recyclable plastic.  I was thrilled to find we were left with only half a bag of actual trash after this.  I’m happier when I’m doing my best for my children and our beautiful planet.

Two years ago we bought a compost bin.  (This one actually: Lifetime 60058 Compost Tumbler, Black, 80-Gallon)  Once again our trash can filled even more slowly, and you just can’t beat free compost for your garden.  It always seemed like such a complicated thing that I didn’t think we could keep up with, but it’s really not a big deal at all.  When it is time to empty our bin next month, we’ll go through some steps to making great compost.

If you have a garden I hope you are not throwing away your eggshells. Please tell me you’re not!  If you are, start saving them now!  When we started out we were throwing our eggshells into the compost.  I knew they were good for it and would add lots of awesome calcium to the soil eventually.  I then read more and more about ways to use eggshells more directly, so I began to rinse them out and place them back in the carton.  When we use the whole dozen, I bake them to dry them out and kill any bacteria.  You can either bake them on your lowest oven temperature for a couple of hours or pop them in the oven after baking something and let it sit in there as the oven cools.  Once they’ve cooled, grind those bad boys up.  You can just crush them into small pieces but it will take quite a while for them to break down and really be beneficial to your plants.  I bought a mortar and pestle and set the kids to work.

IMG_9698

It occupies them for a while, and they get to work on their arm muscles.  😉

IMG_9697

When they are very fine to powder texture we dump them into a storage container.

IMG_9696

I do a few different things with these now.  When I put my tomato plants in the ground at the beginning of the season I have a whole “cocktail” I add to the dug hole before adding the plant.  They get some Epsom Salt, an aspirin, rock dust, organic fertilizer (Fish emulsion or worm castings are wonderful) and a scoop of the ground eggshells.  If you have ever had a problem with blossom end rot, adding ground eggshells or bone meal at the time of planting, before your little tomato plants are even thinking about fruiting, is a wonderful preventative.  I also add them to the areas where I plant my squash and zucchinis since I’ve had trouble with blossom end rot with them as well.

Ground eggshells also help to ward off slugs.  I don’t know about your garden, but mine is a slug magnet in the spring, so I need all the help I can get protecting the plants.  I make a ring around the ground at the base of the little plants with the ground shells and, for the most part, the slugs won’t cross the shells because sharp edges cut their soft bodies.  It’s not perfect, but it is a HUGE help.

Since the pictures of eggshells aren’t overly exciting, I thought I’d add a few that I took this week of a couple of our dragonflies.  We have TONS of these guys flying around the yard lately and the kids and I just love them.

IMG_9648

Sometimes they sit and pose for me for as long as I would like, but this week they were a little too busy and kept flying off after a few seconds.

IMG_9634

I love the blue ones.

IMG_9655

My daughter looked at this and asked if the patterns on dragonfly wings are all different, like fingerprints.  I LOVE when my kids come up with really awesome questions.  🙂  Of course, it also ruins the mom knows everything card.  😀

IMG_9658

I am amazed by their eyes.  It’s probably the photographer in me obsessing over eyes, but W.O.W.!!!

IMG_9656

Summer is going way too fast!  I hope you are enjoying every second of yours!!!

DISCLOSURE:  This post may contain affiliate links, and I may receive compensation for sharing products and information on this site.  These links help support this site, and do not cost you extra to use.  All thoughts and opinions are my own.  See this page for full site Disclosure.  Thank you for supporting Walking Softly Upon the Earth!!  🙂

How I got my husband to look at me like I’m nuts…today

walkingsoftlyupontheearth

My Super Awesome Husband looks at me like I’m nuts several times a week.  Okay, okay.  If I’m being completely honest, it’s probably more like several times a day with a few good eye rolls behind my back thrown in for good measure.  What raises him to Super Awesomeness is that he is totally supportive (despite the eye rolls) and such a good sport through my crazy ideas, even if most of them often lead to crazy amounts of physical labor on his part.

I’ll admit, there are times I think of something to mention or do, just to make him shake his head and roll his eyes.  It’s fun.  Ha Ha!  Today I made him look at me like I’m nuts by making felted wool dryer balls.  “You’re making what?” asks Super Awesome Husband.  “Dryer balls”  I tell him.  “And what are dryer balls?”  he asks with that look on his face that I love.  😀  Ah, life is good!

So today’s project is part of my mission this year to remove chemical filled products from my home.  Luckily for the Super Awesome Husband it requires 0 labor on his part.  🙂  Dryer sheets are full of chemicals and cost money.  Dryer balls are super simple to make, help your clothes dry faster, reduce static and make your clothes less wrinkly and smell nice without all of the chemicals.  All you need to make them is some 100% wool yarn that states hand wash and lay flat to dry on the label.  If you use machine washable yarn it won’t felt, and you need it to felt.  You also need one leg of pantyhose and a blunt needle to sew in your end.

Take your yarn and wrap it into a ball the size of a tennis ball.  Take your blunt ended needle and sew in the end really, really well.  If it’s not done well enough, your ball will unwind and you’ll end up with a felted mess.  If you are really creative or good at forgetting what you can and can not do well,  you can stitch a pretty design on your ball.  I mentioned this to my daughter and she, of course, thought it would be a great idea to have a flower on the one she made.  Let’s just say, every time I sew I remember why I don’t sew.  Next time something might involve sewing, my mom will be called.  Don’t go making fun of my flower!  I mean it!

IMG_9471

Are you done laughing yet?  I totally should have let my daughter do it herself.  🙂

Load all of your balls in to one leg of a pair of pantyhose that you cut off, and tie a knot in between each one.  Try to keep your male children away from them.  It’s an irresistible, fierce, ninja weapon at this point.

IMG_9473

Throw your balls into the washer and wash on hot with as much agitation as your washer offers.  Dry them on high as well.  If you don’t use super dark colors for your dryer balls and have super light colored towels or sheets you can save water and electricity by washing and drying them with your sheets and/or towels.  You will need to do this 2-3 times to get the balls nicely felted.

IMG_9510

Now to use them you just toss 4-6 balls (depending upon how big of a load you washed) into your dryer with your wet laundry and dry.  The wool will absorb some of the water and help you laundry dry faster.  It will also keep the humidity high while releasing it, which will help with wrinkles.  Dryer balls keep the static down and, it you add a drop of your favorite essential oil to each ball, will freshen your laundry and make it smell fantastic!

IMG_9518

I have fallen in love with Young Living Essential Oils, so if you’ve been wanting to try some as well, shoot me an email and I’d be happy to send you information and a sample!  You can use the contact page of the blog or email directly to [email protected]

I want to send a virtual high five to anyone who has made it through this post without giggling at all of the sentences with “your balls” in them.  You are a much better, more mature person than I, and I commend you!!  To those who have been giggling like a middle schooler, you get a high five too, because, well, we all have our issues.  😉

DISCLOSURE:  This post may contain affiliate links, and I may receive compensation for sharing products and information on this site.  All thoughts and opinions are my own.  See this page for full site Disclosure.